I’m Moving! (My Blog)

1 Nov

I'm Moving!Just wanted to let you know I’m moving to a new site! First of all, thanks so much to all who have subscribed, visit and comment. If you have subscribed by e-mail then you should still receive notifications but if for some reason you don’t,  you can still find me at http://www.thestyledsoul.com.

And as always, you can find me by clicking on any of the buttons below!

 photo facebook2_zps93b3abf6.png photo twitter_zps8f4156f0.png photo pinterest_zps21e40a39.png photo instagram_zps5cb9b765.png photo bloglovin_zps272f115e.png

Thanks again for following along! See you soon!

stephanie

Spray Paint & Fun Days

25 Oct

So I had some big plans for my off days this week that involved lots and lots of paint. But as it turns out, this weather is just too good and my hubby has the day off work. So we decided to spend the day with our new little guy Brady.

Brady

We adopted him recently from the local Humane Society and he is the best little guy. So we’re gonna go roam around in the Bronco, play at the park and just generally enjoy a rare day off together. Life’s just too short, ya know? So I just have a quick before and after to share this week. I’ll get to the big stuff next week. 

Before 

jar before

After

jar after

This is why I love spray paint! And painters tape. Have a beautiful weekend!

stephanie

Refinished Kitchen Island

13 Oct

If you’re a DIYer, and you’re anything like me, then you have some unfinished projects around your house. I have about a gazillion. Well, this awesome fall weather we’re having has inspired me to finish up some of these projects. First on the list? Painting and staining this island. 

Refinished Kitchen Island

frig beforea

It used to house our coffee machines before I added the industrial shelving unit. Once I did that I decided to use this piece as an island. And I’m still working on painting that refrigerator. (Remember all those unfinished projects I was talking about?)

Birchwood White

This little makeover was pretty simple. I used some white paint and sandpaper for the base. Birchwood white by Valspar for the first coat  and bright white mystery paint from my basement for the second coat. By the way, this was a free sample of paint. Always check your decorating magazines for a coupon from Lowe’s. Eight ounces of free paint? Yes please.  

DIY Vinegar Stain

For the top I used a DIY vinegar stain followed by a Minwax stain in Dark Walnut. You can read more about the vinegar stain here. It creates a great ashy finish. 

minwaxdarkwalnut

Then I added some simple bun feet using straight top plates.

furniture feet and straight top plates

Before

kitchen island before

After

kitchen island makeover after

No Island

kitchen makeover

Island

painted kitchen islandKitchen island makeoverpainted kitchen islandsteel wool and vinegar stain for island

I always thought our kitchen was too small for an island but it actually makes it so much more functional because it gives us more counter space to work with. It’s a small change but it makes a big difference. So that’s one thing I can cross off the list! What’s on your list of unfinished projects?

Linking up at some great linky parties this week. Liz Marie Blog / DIY Showoff / Rain on a Tin Roof / The Shabby Nest  / Suburbs Mama / Domestically Speaking / Start at Home

stephanie

Coastal Eclectic Bedroom Chair

4 Oct

It’s so hard to leave the beach. If you follow me on Instagram then you know we just spent a week at the beach doing absolutely nothing. And it was awesome. This was my view pretty much everyday. 

Miramar Beach


It’s kinda hard to get back into the groove of reality but at the same time it’s really good to be home. Anyway, we did a little thrifting while we were there. I love thrift shops in beach towns, they always have the best stuff. While I didn’t bring anything home with me I did remember that I never really shared the makeover of the chair I bought last year at the beach.

 Yep, LAST year. And it was only 20 bucks.I bought it not knowing exactly where I wanted to use it but I knew at some point it would be perfect somewhere. How’s that for vague? This is what it looked like when I bought it. 

wicker chair before

It was a little dirty and a lot blah. It was in great shape though and it’s really comfy.Once I gave our bedroom a little makeover I knew  exactly what to do with the chair.I started by spray painting it white but I knew it needed something else. So I broke out my favorite Purdy brand paint brush to paint the wicker.

martha stewart gold paint

I painted it with this  Martha Stewart Specialty paint in Vintage Gold. This is absolutely one of my favorite gold paints. It has the best shimmery gold finish. 

greek key fabric

Then I recovered the cushion in this greek key fabric. I found it on the remnant table at Hancock Fabrics. I geeked out a little bit right there in the store when I found it. It’s pretty rare to find something this fab so cheap. They sell remnants for around $5.00-$6.00 per yard.  I got about four yards so you’ll be seeing this fabric again.

Then I went back and forth with these two pillows.

I decided I like the grey one best. I love the mix of the patterns in the neutral tones and I especially love it against the shimmery metallic paint.

Wicker Bamboo CHair

Wicker Chair painted Gold and White

Wicker chair with greek key fabric

Wicker gold greek key ikat

wicker bamboo chair

So it only took a year but it did finally get a makeover. Sometimes that’s how long it takes to get something right. It took me the longest to decide what to call this chair but I think it’s kinda coastal and kinda eclectic. So there ya go. You may have noticed I started painting the bedroom. No more Bittersweet Chocolate!  I can’t wait to get it finished so I can show you how much better it looks. And cross it off my list….

This is where you will find me linking up this week. Liz Marie Blog / The Shabby Nest / Suburbs Mama / Rain on a Tin Roof / The Blissful Bee / The DIY Dreamer

stephanie

My Must-Haves for a Cozy Fall Porch

20 Sep

Cozy Fall Porch

It’s finally my favorite time of year. Fall is here! There is just something about fall  that feels like renewal. I don’t know if it’s just the break from the smothering humidity we get in the south, but I feel like I can breath again. With that feeling comes along the need for change. And the need for salted caramel lattes from Starbucks. Oh. My. Word. Have you ever had one of those things? Forget the pumpkin bring me the salted caramel.

Anyway, since we like to spend time on the porch, especially this time of year, I decided to give it a fresh new look and share my “must-haves” for a cozy fall porch.

1. A seat big enough for two. A bench is perfect for a porch. They’re typically small but still big enough for two. I painted this one with three coats of plain old white paint that had been sitting in the basement for-ever. I used this to paint it. 

Graco SprayStation 1900

This thing is where it’s at! It’s the Graco Spray Station 1900. My brother-in-law gave me this for Christmas and I will be forever grateful. It would have taken days to paint all those slats by hand.

Painted Bench Fall Porch

2.Pillows! Pillows are really a must-have in any situation though, right? I made all of these (except for the sequin pillow and the large brown and white pillow) from leftover fabric remnants and an old shower curtain.

DIY Fall Porch Pillows

DIY Fall Porch Pillows

3. A cozy throw. Perfect to curl up in on a chilly night while reading a good book. I picked this one up at TJ Maxx. It’s soooo soft.

Cozy Fall Porch

4. A tray. You have to have a spot for your coffee or hot chocolate. Or wine. ;) I made this tray from an old picture frame and pretty wrapping paper.

Tray for Fall Porch

Tray for Fall Porch

5. Pumpkins! Is there anything more fall than pumpkins? I could go crazy painting and decorating pumpkins but I limited myself to just two. I spray painted these then blinged them out a little. I added a monogram to the black one using nail trim. For the white one I spray painted the backs of some iron-on leaves and hot glued them to the pumpkin.

Painted PumpkinsPainted Pumpkin Fall Porch

Cozy Fall Porch

Cozy Fall Porch

So do you think I missed anything? So looking forward to hanging out on the porch as the nights get cooler! Happy Fall Ya’ll!!

Linking up at some great blogs this week. Hop over and check them out! Liz Marie Blog / A Stylish Interior / The Shabby Nest / Start at Home / Suburbs Mama / DIY Showoff / Rain on a Tin Roof / The Blissful Bee / The DIY Dreamer / Simply Designing with Ashley / One Project Closer

The Lettered Cottage

 photo name_zpse215d949.png

Thrift Store Art Makeover: Chic Horses

30 Aug

Hey there! Well this week I’m finally adding some artwork to our home that I’ve been thinking about for the longest. This is proof that pretty artwork doesn’t have to be expensive. For me, it just required a little patience. 

DIY Horse Art

 After weeks of searching I found what I needed.

thrift store frame

1. I had to find the perfect frame. I picked this up at a thrift store for $10.00. 


Horse Poster from Hobby Lobby

2. I had to find the perfect horse print. I’ve seen many photos and paintings of horses but this one just spoke to me. Ya know what I mean? I found this at Hobby Lobby. With their weekly 40% off coupon it only cost around $18.00.


Gold and White Spray Paint

3. I wanted it framed in gold and matted in white. (The frame was already gold but was kind of dated, in a faux finish.)  I picked up these spray paints for less than $10.00. Gold for the frame and white for the mat board.

Before

thrift store frame

After

DIY Horse Art

Less than $40.00 for a large, matted and framed print. Not bad! These guys are getting a home above the fireplace in the living room. I’ll have more pics for you once I get it in place.

Linking up at some great linky parties this week!

Liz Marie Blog

Suburbs Mama

Start at Home

DIY Showoff

Rain On a Tin Roof

Love Grows Wild

The Blissful Bee

A Stylish Interior

 photo name_zpse215d949.png

Bedroom Makeover: A Much Needed Change

22 Aug

Hey y’all! Hope you’re all having a great week. Mine has been a little rough. We had to say goodbye to our sweet little Lola. She was our furry baby and it was devastating to have to let her go. But I won’t dwell on that. I just want to say that we are so thankful to have been blessed with her in our lives and we SO appreciate all the kind words and prayers from everyone.

Anyway, I had been planning to give our bedroom a much needed freshening up and after what happened this week it seemed like the perfect time to just get in there and get it done. It was a GREAT distraction. There are still a few more things I want to do, like paint a white wall, add some artwork, and add a new light fixture and some accessories. But I did get a lot done and now it feels fresh and crisp. Exactly what we needed. 

Eclectic Bedroom Makeover

Coral Grey Indigo White Bedroom

Painted Bamboo Wicker Chair

Gold Painted Wicker Bamboo Chair

DIY Upholstered Headboard

Grey Bedroom RugLolaCheck out these before pictures.

Bedroom Before

Bedroom Before

This is what I’ve done so far. 

  • Painted the bamboo chair in white and gold. Covered the seat cushion in a grey/white greek key fabric. 
  • Reupholstered the headboard in a bright white fabric and added a nailhead trim. I used a table cloth from Target. 
  • Replaced the wooden storage bench with an upholstered ottoman. 
  • Pulled the white duvet cover from the guest room and kept the Nate Berkus indigo pillow shams. (If you’ve been following for a while then you know I was determined to use some of that indigo blue bedding). 
  • Added one of my DIY Gold Painted Pillows along with some other new and old toss pillows. 
  • Added a new rug from Garden Ridge. 
  • Hung a set of mirrors above the bed. I found those at Target. I was trying to create the illusion of a taller headboard. 

Bamboo Wicker Chair Before and After

Bedroom Before and After

I totally believe that if you make your home a happier place you’ll be a happier person. That was pretty much the goal this week, to make our home a happy place to be.

Thanks so much for stopping by. Have a beautiful weekend!

 photo name_zpse215d949.png

Linking up to some fab linky parties this week.

Liz Marie Blog

If It’s Not Baroque

The Shabby Nest

Suburbs Mama

DIY Showoff

Rain on a Tin Roof

Homecoming

The Blissful Bee

A Stylish Interior

Christmas On My Mind

15 Aug

Forever Love


Ok, I know Summer isn’t officially over yet but there is just the slightest touch of fall in the air and it’s got me thinking about the holidays. I am totally one of those people that puts up their Christmas tree the DAY after Thanksgiving and I adore chic Christmas cards, like the one shown above. I found it on a Norwegian website. Click through to the source if you want to see some very cool photos. And if you speak Norwegian tell them I’m a fan. ;)

Anyway,  I’ve been pinning images of some majorly creative Christmas decorating to get some inspiration for what I want to do this year. 

Last year: Black, White, Neutral and Metallic

DIY Christmas StockingsWhite Christmas Tree

Christmas Table Decor

DIY Chrsitmas Stockings

Inspiration

This year I think I’d like to go a little more eclectic. I’m thinking more color and more pattern. As my husband would say, “bring it”.  Check out these images I found for some amazing and VERY non-traditional Christmas decorating ideas.

eclectic-dining-room

Houzz

Caftberry Bush

folklifestyle.com

lonny

lonny.com

Jill Sharp Brinson

Jill Sharp Brinson

modern-christmas-decoration-7

Adorable Home

Better Homes & Gardens Pink Christmas

Better Homes & Gardens

belmont+design+group+christmas+decorations

BDG Style

The great thing about decorating for Christmas is that you can get outside the box a little, since it’s only temporary. I just might have to get started early this year!

Do you get excited about Christmas decorating? Do you use traditional reds and greens or do you mix it up? I would LOVE to see pics of what you’ve done in the past.  Post a link below and it could be pinned to my “Decorating for Christmas” Pinterest board!!

 photo name_zpse215d949.png

A Day In the Life

9 Aug

You may or may not know that I work in a furniture store.  Yes, I’m a furniture sales person. Well, my official title is “Design Consultant”. I sell beautiful new furniture and I often get to help people decorate their homes. So, I blog about DIY decor and refinishing old pieces of furniture but I also sell new furniture. Maybe that seems like a weird conflict of interest but the truth is I just love furniture and decorating of all kinds and price ranges.

work2

I grew up with a father that refinished furniture for a living. He is pretty amazing. BUT, it wasn’t until I started working in the furniture industry that I really began to learn about decorating and began to develop my own personal style. I had already been following DIY/decor blogs for a few years and thought about how much fun it would be to have a blog of my own.  So when I began working in the furniture industry, and really started to develop an interest in the field, blogging just seemed like a good fit. 

I know that many DIY/home decor bloggers have at one time or another worked in the furniture industry so they pretty much know what it’s like. But for those that haven’t I thought it might be fun to share a Day-in-the-Life of what it’s like to work in a furniture store. 

Before I get into all this let me tell you about the place I work. It’s called EF Brannon Furniture. It’s family owned and operated. The people I work for are AWESOME,  the furniture we sell is high quality, and I work with some very talented people. I have learned A LOT here. Ok, here goes.

9:30 AM  First Things First 

coffee at work

My work day starts at 9:30 am. Of course I have to start my day with coffee. Now I don’t usually get Starbucks but I happened to have a gift card and it was a Monday so I needed a little extra “Go Juice”.

Monday mornings are when I check the status of all my orders. This means making sure everything is on schedule and that all the fabric numbers and item numbers are correct. While I’m doing that a customer calls and requests that I fax a quote she needs. As I make my way to the office I spy a bolt of fabric that I had been waiting on for a customer. Then I do a little happy dance. The fabric had been back-ordered and I expected it to take a little longer. (Those of you that have done this type of work know the relief I’m feeling right now). Call said customer to give her the good news.

11:00 AM Help my First Customer of the Day

This customer was shopping for a white slip-covered sofa and dining furniture with a coastal look. We can do that. He wanted to accent the pieces with bright greens and blues so we picked out some pieces and pulled some fabrics. I love this kind of look by the way.

photo 3 (6)


1:00 PM In Home Consultation

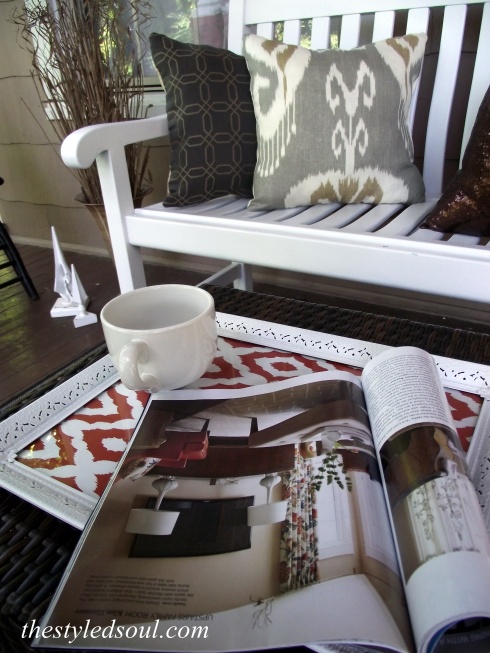
Earlier in the day I had received a call from a customer that needed a little help decorating. She recently moved into a new home and wants a look inspired by a particular issue of Traditional Home Magazine. Unfortunately, she had lost her copy and couldn’t find another one anywhere. Of course I had every issue of Traditional Home at work EXCEPT the one she needed. Of course. Luckily I found it in my stash at home and got it to her the next day.

In the meantime, we meet at her home. An “In Home Consultation” basically consists of measuring the space and discussing things like, what type of look they want, colors that inspire them, and how they want the room to function. We want it to look great AND be functional. So we choose some possible paint colors for the space and talk about fabric colors and patterns. After we finish up I get back to the store and get to work.

photo (15)

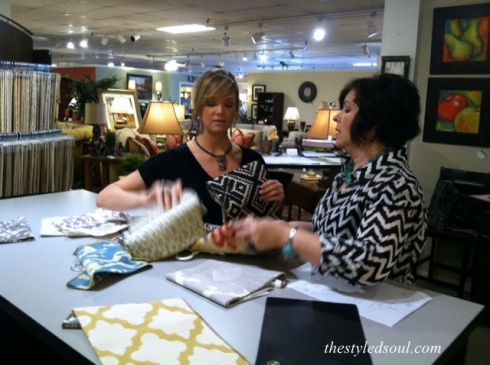
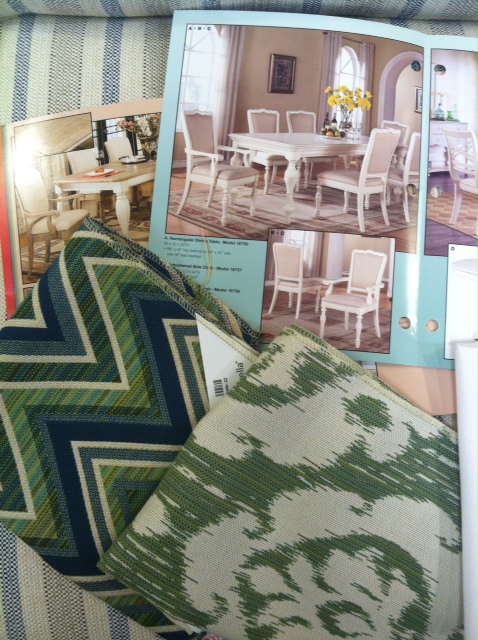
After sketching out a VERY rough draft for the floor plan I pull some fabrics. A lot of times we bounce ideas off each other in the design center. That’s Mary on the right, a co-worker and an awesome decorator. 

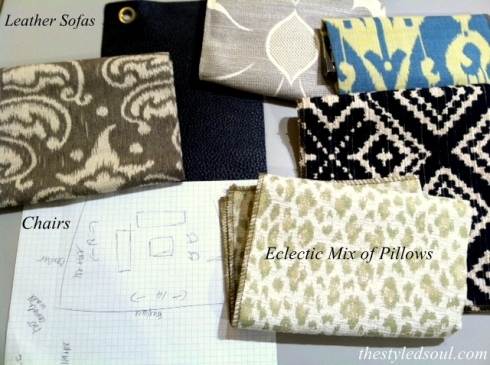
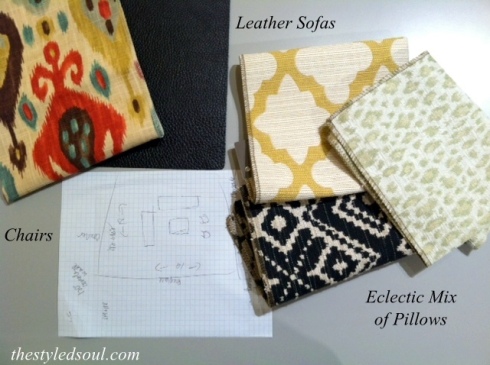
So I pull together two possible options.

 photo Plan1_zps6266dc61.png

Plan 1

 photo plan2_zpsf673a886.png

Plan 2

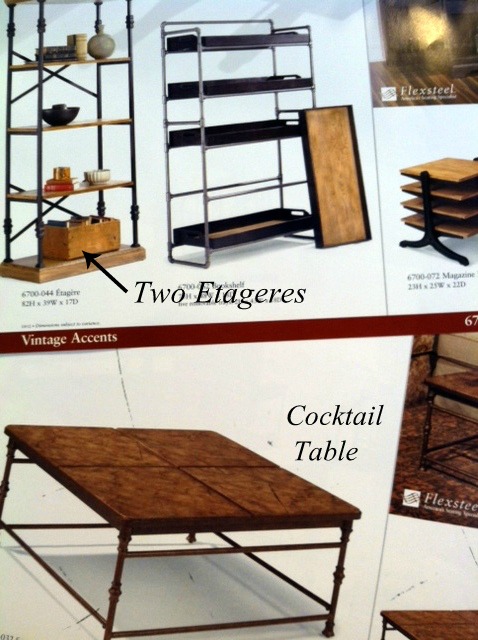
Next I choose some tables and other accent pieces.

tables1

So now that I have a plan I just need to put it all together to present to my customer, which I will do before we meet up again.

4:00 PM Coffee Break

coffee break

So 4:00 rolls around and it is definitely time for a coffee break. You know I still have that gift card and luckily for me Starbucks is just across the street. So I have some coffee, check my e-mail and try to organize the mess that is my paperwork.

5:00 PM Greet a New Customer

combo

I greet another customer who is  looking for a sofa and a chair. She loves grey and is going for a dressy look. We look at a few things and she decides on this pretty combo. She will have to come back though, to let her husband pick out a recliner. I know what you’re thinking, “a recliner with that”? Don’t worry, it can be done. We carry a lot of different styles of recliners and I know we have one to work with this. You know what Tim Gunn would say. Make it work. 

So there you have it.  While there is so much more that goes on behind the scenes that is basically a Day-in-the-Life of a furniture salesperson. Or at least, a day in MY life. Some days are crazy, some days are a little more quiet, and really anything can happen. I guess that’s one of the things I love about my job. Everyday involves different people with different requests, so it never gets boring.

Hope you enjoyed this little summary of my day! Have you ever worked in a furniture store? What was it like for you?  

Thanks for taking the time to read this!

 photo name_zpse215d949.png

DIY Gold Painted Pillows

2 Aug

I have a quick project to share with you today. It’s really easy and can be done in an afternoon. diy gold painted pillows

If you have some pillows you want to jazz up then this is for you. Martha Stewart Metallic Paint. Every time I went to Home Depot I would eyeball this paint. I don’t know what took me so long but I finally bought some.

Martha Stewart Gold PaintThere are about a hundred things I wanted to use this paint on but I decided to start with these plain toss pillows I made a while ago. They were nothing special. I had simply sewn together some old fabric swatches I had lying around. They are so much better now.

This is what I started with.

Martha Stewart Gold Paint

DIY painted pillow

DIY painted pillow

Yeah they are FAR from perfect but keep in mind sewing is “not mah thang”.

I taped off the first pillow so that I would end up with two bold stripes through the center of the pillow. I measured about 3 1/2″ between the strips of tape.

DIY painted pillows

Once I started painting I quickly realized it would work much better with a paint brush.

DIY gold painted pillow

The fabric is textured so it was easier to get the paint to stick in all the grooves with a brush.

A couple of things I learned about painting fabric. 

  • Paint on top of and away from the tape. Not toward it. It felt like the paint would easily slide under the tape.
  • Don’t put a lot of paint on the brush but saturate the fabric really well so you only have to apply one coat.

For the second pillow I wanted a diagonal pattern so I placed the tape in diagonal strips about 3″ apart.

DIY gold painted pillow

This is how they turned out.

diy gold painted pillows

diy gold painted pillowsdiy gold painted pillowsdiy gold painted pillowsdiy gold painted pillows

This was so easy. Seriously, it only took a couple of hours including dry time. I LOVE this paint. Thanks Martha! I can’t wait to try it on some other things. Until now, painting something gold required spray painting which meant if it was raining I could forget it. Oh, and it’s kind of hard to tell in the photos but it has a GORGEOUS metallic sheen and it isn’t as deep of a gold that you get from most spray paints. LOVE!

I’m still playing around with where I want to keep the pillows but for now they look pretty good in the living room. Oh, and I now have new inspiration to refinish our dining chairs. Maybe I can get to that soon….

So have you ever painted fabric? Share!!

This is where I’ll be linking up this week. Come check it out!

Liz Marie Blog

Suburbs Mama

DIY Showoff

Give Me the Goods Monday @ Rain On a Tin Roof

If It’s Not Baroque

The Blissful Bee

Home Coming


 photo name_zpse215d949.png