Tag Archives: weathered wood

Refinished Kitchen Island

13 Oct

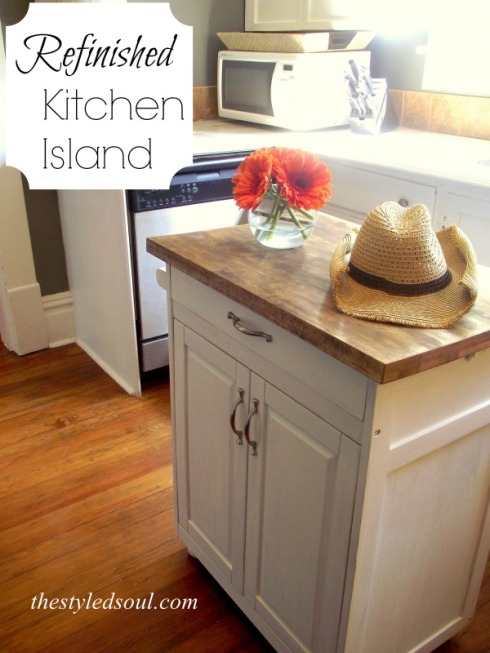
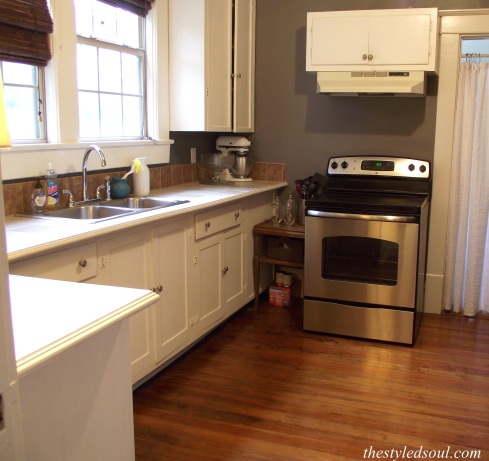
If you’re a DIYer, and you’re anything like me, then you have some unfinished projects around your house. I have about a gazillion. Well, this awesome fall weather we’re having has inspired me to finish up some of these projects. First on the list? Painting and staining this island. 

Refinished Kitchen Island

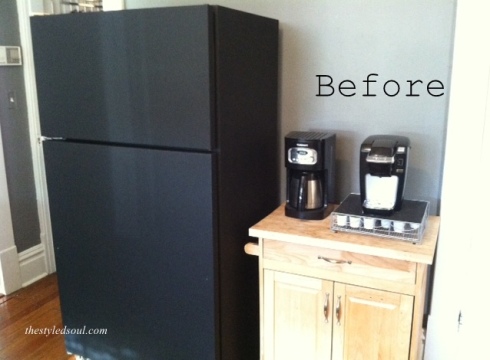
frig beforea

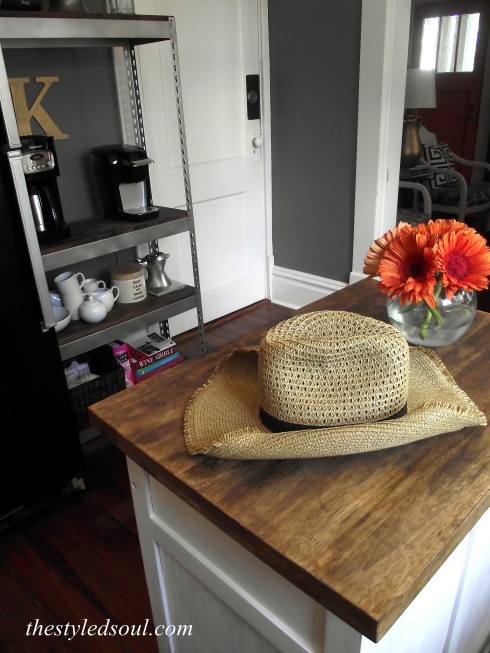
It used to house our coffee machines before I added the industrial shelving unit. Once I did that I decided to use this piece as an island. And I’m still working on painting that refrigerator. (Remember all those unfinished projects I was talking about?)

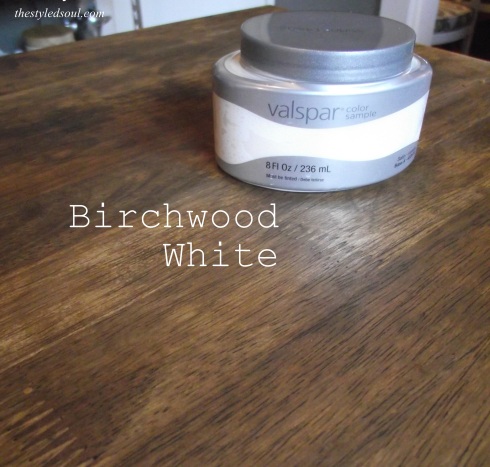
Birchwood White

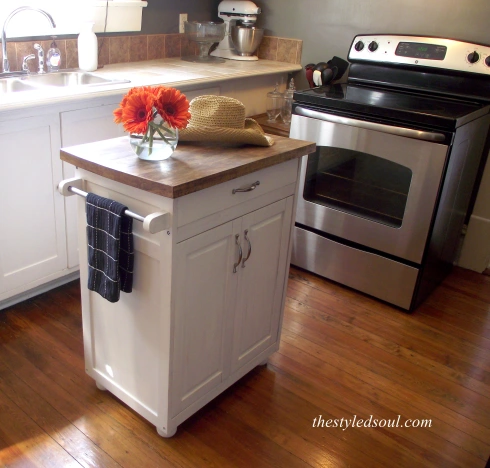
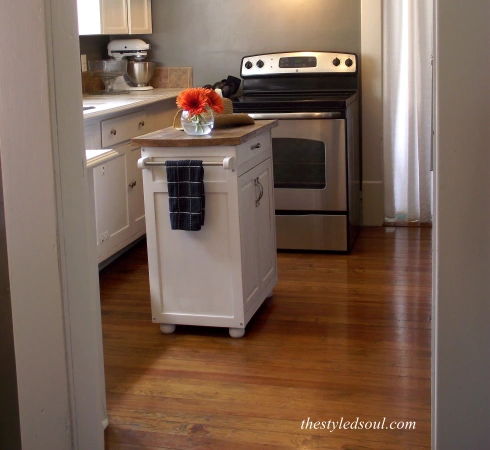
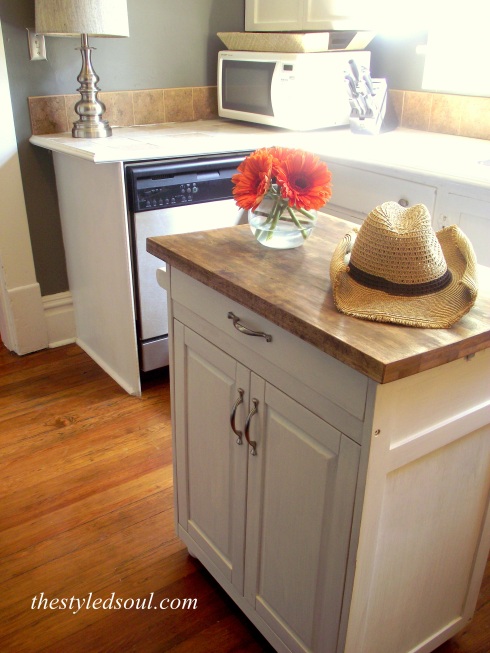
This little makeover was pretty simple. I used some white paint and sandpaper for the base. Birchwood white by Valspar for the first coat  and bright white mystery paint from my basement for the second coat. By the way, this was a free sample of paint. Always check your decorating magazines for a coupon from Lowe’s. Eight ounces of free paint? Yes please.  

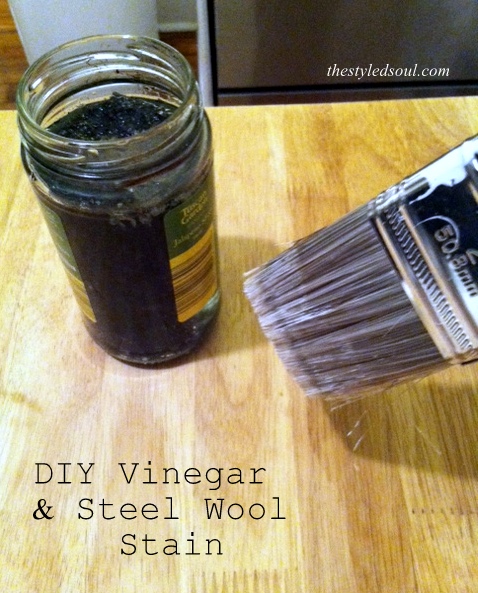
DIY Vinegar Stain

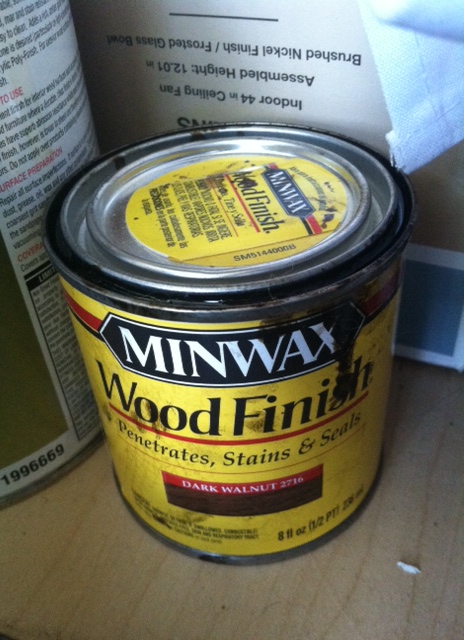
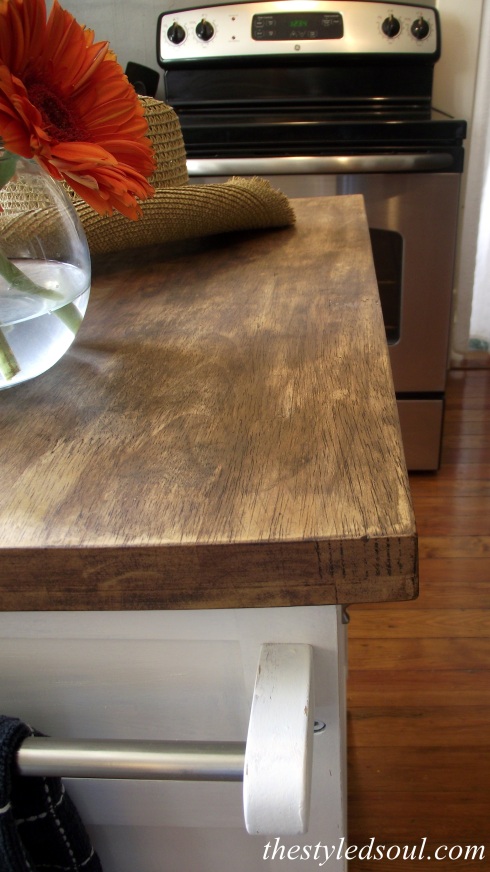
For the top I used a DIY vinegar stain followed by a Minwax stain in Dark Walnut. You can read more about the vinegar stain here. It creates a great ashy finish. 

minwaxdarkwalnut

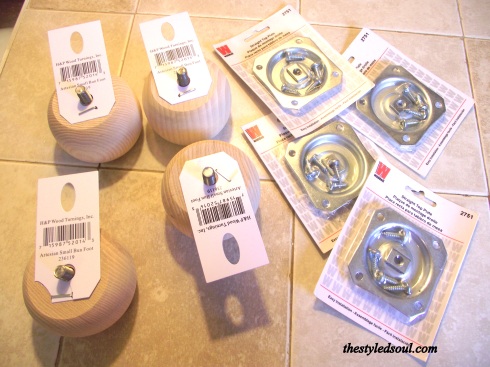
Then I added some simple bun feet using straight top plates.

furniture feet and straight top plates

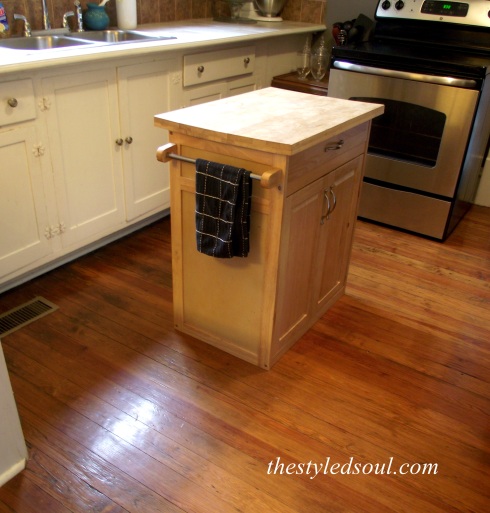
Before

kitchen island before

After

kitchen island makeover after

No Island

kitchen makeover

Island

painted kitchen islandKitchen island makeoverpainted kitchen islandsteel wool and vinegar stain for island

I always thought our kitchen was too small for an island but it actually makes it so much more functional because it gives us more counter space to work with. It’s a small change but it makes a big difference. So that’s one thing I can cross off the list! What’s on your list of unfinished projects?

Linking up at some great linky parties this week. Liz Marie Blog / DIY Showoff / Rain on a Tin Roof / The Shabby Nest  / Suburbs Mama / Domestically Speaking / Start at Home

stephanie

Small Space Solution: DIY Industrial Shelves

7 Jun

DIY Industrial Shelves

I love our home. It’s old and has lots of old house charm but it’s also small and storage space is limited. Because of this I have always struggled with keeping things organized in the kitchen.

After I started painting the refrigerator I started thinking about ways I could make better use of the space next to it. I decided I wanted something taller and with shelves. This would allow us to keep the coffee makers where they are (which frees up counter space) and also give us more storage.

I found this at World Market for $89.99.

wmshelf

I love the looks of it but it just wasn’t big enough. After a little more searching I just couldn’t find anything I wanted in my price range so I decided to make one using the World Market piece as my inspiration.

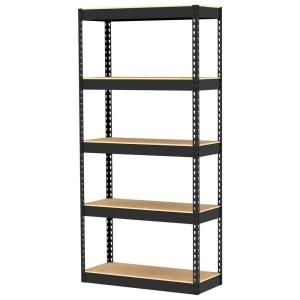
I found this at Home Depot.
Gorilla Rack

Gorilla Rack Free Standing Storage Unit

The metal is almost exactly the same as the World Market piece which is one reason I chose it. The second great thing about it is that it’s the perfect size for my space and third it claims to hold 250 lbs per shelf.

The makeover was really pretty easy. Spray paint my friends, spray paint. I went with a metallic silver finish because I thought it would look good next to the freshly painted black refrigerator (which is almost finished). I used a combination of the following three spray paints.

  1. Brushed Nickel by Valspar
  2. Dull Aluminum  by Krylon
  3. Hammered Metal by Krylon

I gave it one coat of the brushed nickel followed by a coat of the dull aluminum. Then I randomly sprayed sections of it with the hammered metal. I wanted it to have dimension and look a little less new.

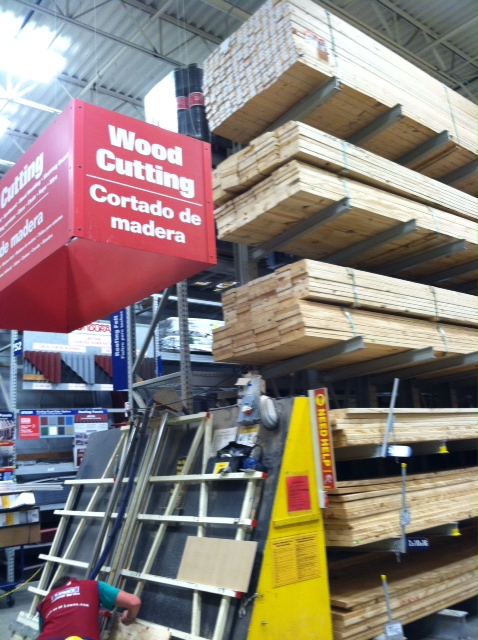
I didn’t want to use the particle board shelves that came with it. I wanted actual wood shelves. So I took one of the shelves to Lowe’s and picked out the type of wood I wanted from the Lumber Isle. Then I just gave the very nice wood cutter guy the particle board shelf  and asked him to make the boards the same size.
lowes

I love the people that work at Lowe’s!

I chose paint grade pine. I knew it would give me the look I was going for. So I sanded them down and stained them with one coat of vinegar soaked in steel wool then I stained them with a layer of Min-wax in Dark Walnut.

DIY Industrial Shelves

I used the scraps of  wood that were left over when they were cut to test the stains first. Always keeps the scraps so you use them for testing when using a new paint or stain.

I decided I liked the richness of the stain over the vinegar. Now if you are going to be using anything that could get these boards wet, like coffee makers,  then you will want to apply a polyurethane. I recommend Rust-Oleum Polyurethane  in matte finish. It protects the wood really well without any shine.

I let the boards dry overnight before I put anything on them.

DIY Industrial Shelves

DIY Industrial Shelves

DIY Industrial Shelves

DIY Industrial Shelves

DIY Industrial ShelvesDIY Industrial Shelves

After buying everything I needed for this shelving unit I still spent less than I would have on the piece from World Market. Plus it’s bigger and it’s the exact color that I wanted.

If you want to do something like this for your own home you can usually find these shelving units at Home Depot and Lowe’s in various sizes and styles. Home Depot offered free shipping to their store which was perfect for me. You could possibly find these on Amazon as well.

So what do you think? Would you use something like this in your kitchen or do you prefer that everything be hidden?

Have a great weekend everyone and Happy DIYing!!!

These are the fabulous blogs I’m linking up at this week.

GrabButtonLiz

TDC Before and After


Am I Crazy? Reupholstered Dining Chairs

3 May

White upholstery is scary. Granted we don’t have any children. Well, not human ones but we do have three furry ones and they love to sit on the dining chairs. And of course by sit I mean wallow. Plus there is also the whole food thing and my clumsy factor.  Well, white is what I really wanted on these chairs so I went for it. Life’s too short to worry about it. Plus, they’re just chair seats. Right?

grey weathered dining chair

This (below) is what I originally covered the seats with. I loved it at first, but got tired of it pretty quickly. Then, when I moved the dining furniture into another room the fabric REALLY didn’t work. So when I found some white fabric on super clearance at Hancock Fabrics I jumped on it.

grey weathered dining chair

I removed the old fabric with scissors, a screwdriver and pliers. Then, before I cut the fabric I measured the width and length of the seat to determine how much fabric each seat would need.  You basically just measure the width and length then add about six inches to each side.

cut fabric

Then I ironed the fabric and started stapling. I hate using the staple gun. I’m always afraid I’ll point it in the wrong direction and lose an eye.

staple gun

Keep in mind when you go around the corners you have to kind of pull and gather the fabric so it pleats and you don’t get any wrinkles that show on the top.

pleat

Then I cut all the excess fabric off. This is when you cover the bottom of the seat with another piece of fabric so everything is nice and tidy. Yeah, haven’t done that yet. In fact I’ve only recovered one chair so far, which is why the whole table isn’t pictured.

cut excess fabric

I think the white fabric looks so much better with everything else going on in this room.

grey weathered dining chair

grey weathered dining chair

grey white weathered chair

Pretty soon I will have this table and chairs totally finished. You can see what it used to look like here.

So do you think I made the right choice?  Do you use white upholstery in your dining room?

I need to know these things :)

Happy Weekend!!

Stephanie

Hope Chest Turned Dining Room Bench

21 Sep

 So I totally lucked out on this hope chest. It was a freebie from someone who just wanted to get rid of it. Well it just so happens that it’s perfect for my dining room. Not only can it be used as storage but I can pull it up to the dining room table as seating when we use the leaf.

 It took me forever to decide what I wanted to do with it but I finally figured it out. This is what it looks like now.

I could have just painted the whole thing but I just wasn’t feeling those floral carvings. So I painted everything but the front panels with two coats of white chalk paint then I lightly distressed it.

Then, I went to Lowe’s and bought a small sheet of birch ( I think ?) and had them cut it into four small pieces that were cut to fit each section. Then I tried to distress them a little using a rock and a hammer but I  almost broke one of them so I made myself  stop. (I got a little crazy with the hammer).

Then I applied a steel wool and vinegar solution similar to what I did to my dining table only this time I didn’t use tea. After I applied the steel wool/vinegar I applied an uneven coat of dark pecan stain. I was hoping to give it a little bit of a weathered look.

Then all that was left to do was apply the panels to the chest. I like E9000 glue for this type of project. If you use it just be prepared to smell it for weeks. It’s really strong.

Before:

After:

I’m still playing around with the pillows and the accessories on the shelves. I can’t decide if it needs color or not. I kinda love the coral with it.

So happy I can mark another dining room project off my list!! One of these days I WILL finish this room.

I’m linked up at

 http://www.lizmarieblog.com/

and

http://www.jenniferrizzo.com/

Finished (Almost) Dining Chairs

25 Jul

My dining table and chairs are (almost) finished!! I’m still adding the upholstery to the rest of the chairs but here is the first one I finished.

In case you forgot here is another before pic of the table and chairs.

I ended up going a different direction with the chairs and I’m so glad I did. My plan was to paint the chairs the same white as the table base but when I finished the second chair I just wasn’t feeling it. They just looked too “new” or something.

So I took some sandpaper and started distressing one of the chairs. I still wasn’t crazy about it. So then…I tried wiping a dark stain on it. Uh..no that didn’t work. It just turned it a yucky beige color. Then I remembered the paint that I used on the edge of the table and it hit me. Dry-brushing! So that’s what I did.

Here’s the breakdown of how I got the look.

  • Step 1: I gave the chairs a good once over sanding with the power sander. Really just enough to knock the shine off so they looked like this.

  • Step 2: I painted the chairs with two coats of chalk paint and I lightly hand-sanded them between coats.

  • Step 3: I distressed the chairs with the power sander to make them look a little “beat up” or “aged”.

  • Step 4: I used the dry brushing technique to apply the slate brown paint.  This is where they start to look “weathered”. If you’ve never dry-brushed something it’s really simple. Basically you just put a tiny amount of paint on the tip of your paintbrush, dab it on a cloth or sponge to remove the excess, and lightly brush the paint onto the furniture with quick back and forth stokes.


I totally lucked out on the fabric. I decided to go to Hancock Fabrics one last time before I ordered any fabric online because I still wasn’t exactly sure what I wanted. I couldn’t believe it when I found this. ( My fabric is a little more blue than this).

It was tagged $12.95 a yard and  it was on sale for 60% off that price which made it $5.18 per yard! Woo hoo! ! I went ahead and got four yards at that price even though that’s probably more than I need. I’m sure to use the extra fabric somewhere else.  So after I removed about a MILLION staples from the chair seats (while being stared at),

I started covering the chairs with the new fabric using my trusty staple gun.


I’m loving the contrast of the “aged” chairs with the clean look of the table base.  I cannot wait to get this room finished! My next step is to paint the room and figure out what I want to do about the window panels. I’ll repost when EVERYTHING is finished.

So what do you think? Would you have left the chairs white? Do you like chairs that match your table or do you prefer a “mixed up” look?

P.S. Little safety tips (useful if you are clumsy like me).  Always wear a mask when sanding and always wear safety goggles when using a staple gun. :)

Stay Tuned!

Dining Table Update

12 Jul

DSCF4265

Well last week was a little crazy with wind storms and trees down everywhere but I did manage to find some time to work on the table. There wasn’t a whole lot else to do without power.  No complaints here though. It could have been a LOT worse.

So…while my very nice and thoughtful husband did this:

I did this:

Good thing my power sander was already charged so I could give the legs a few final touches before painting them. I’m diggin’ this look by the way.

This is the table now.

Totally in love with this table. No really, I just sit and stare at it. Does that make me a little weird? Probably.

This is the table before.


So if you are wondering how I did this here goes.

I started by completely sanding the stain off the top with a power sander using 80 grit sanding pads since I knew I would be staining it. For the base I only gave it a rough once over sanding since I would be painting it. Then I did a little research online about “weathering” new wood. There are several ways to do it but this is the one I went with.

  • Step 1: Prep the stain. Soak some steel wool in white vinegar in a glass jar for at least 24 hours. I used steel wool grade #0000 and used enough vinegar to completely cover the wool. Here’ s a little tip. DO NOT screw the lid on tight.  After about 20 minutes of it sitting on the kitchen counter we heard this strange noise like frying bacon or running water. When we realized it was my little science experiment, and found that the jar was HOT we panicked a little. Luckily Bill was brave enough to take it outside and open it. I was totally prepared for an explosion but thankfully nothing happened so I just sat the lid loosely on top. Crisis averted.

  • Step 2: After you have soaked the steel wool for at least 24 hours and are ready to use the stain you need to brew a strong cup of hot tea and let it cool.
  • Step 3: Apply the tea to the table. I applied one coat using a paint brush. Not a lot but just enough to soak into the wood. It totally freaked me out because this is how it looked wet. It went back to the original color after it dried and it dried pretty quickly.

  • Step 4: This is the best part.  Apply the vinegar solution. I used a paint brush but you could also use a cloth. Just rub it on then wipe off the excess. It’s that easy. I actually applied a second coat just for kicks and because it looked a little light. You could give this a REALLY weathered look by banging the table up a little on the top but I just couldn’t bring myself to do it. I loved the look too much. I figure it will get beat up enough when we start using it.

About the edge of the table…. it wasn’t wood so I had to paint it to match the color of the table top. I just applied one coat of Clark & Kensington paint then distressed it a little with 150 grit sandpaper to make it blend in with the wood. The color is called Slate Brown. I had originally found this paint swatch at Sears but I took it to Ace Hardware and they whipped it up for me.

I painted the base of the table with two coats of homemade chalk paint in Balboa Mist. It is a Benjamin Moore color but again I had it made in Clark & Kensington. If you don’t know about chalk paint I will just tell you. It. Is. Awesome. No sanding required, it will stick to anything, and it is easy to distress. There are a lot of ways to make it but this is the recipe I use. I found it at lizmarieblog.com. FYI…her blog is GREAT!

So that’s it for now. I’m currently working on the chairs and hope to have them done soon. I am painting them the same color as the table base but I’m thinking I will distress them so they look a little different from the table.

Now I just have to decide on a fabric for the chair seats. I’m loving ALL of these fabrics from fabric.com!!

Thoughts?