Tag Archives: chalk paint

Refinished Kitchen Island

13 Oct

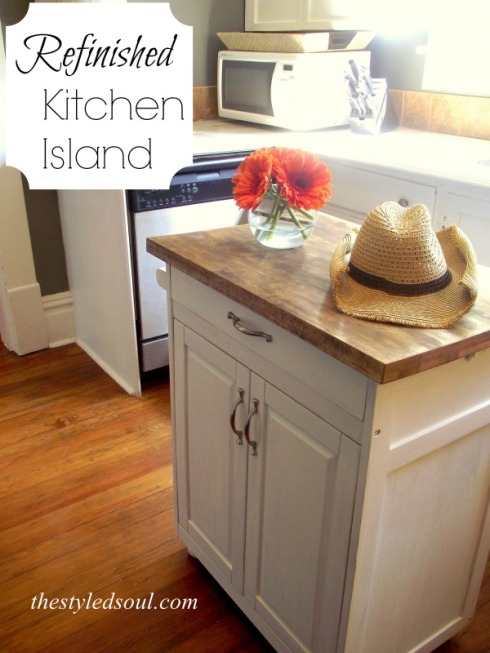
If you’re a DIYer, and you’re anything like me, then you have some unfinished projects around your house. I have about a gazillion. Well, this awesome fall weather we’re having has inspired me to finish up some of these projects. First on the list? Painting and staining this island. 

Refinished Kitchen Island

frig beforea

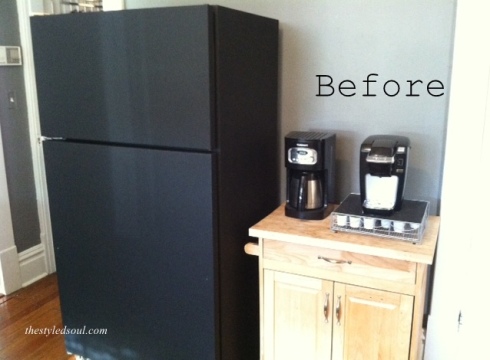
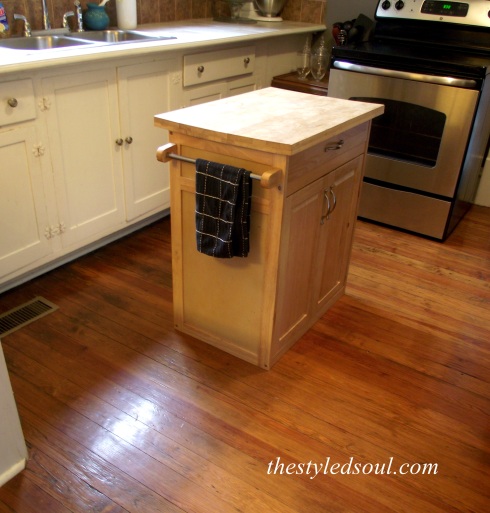
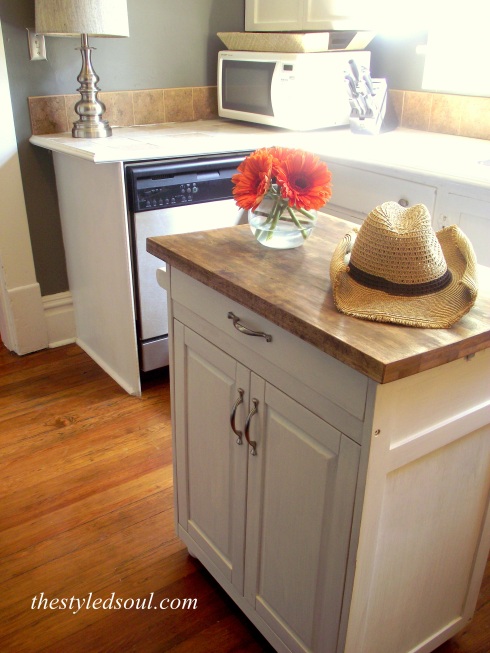
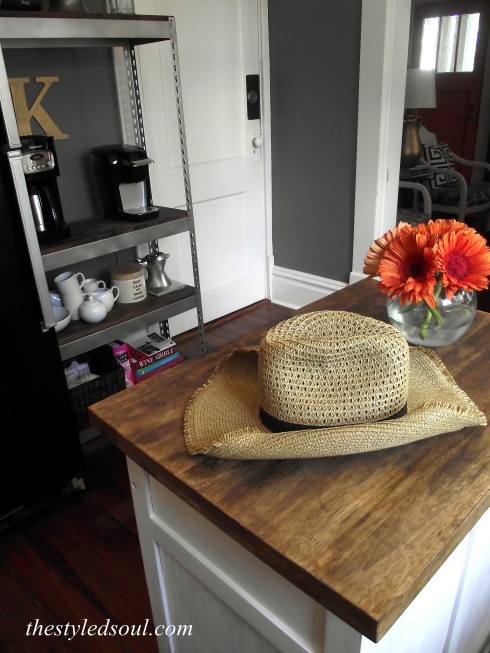
It used to house our coffee machines before I added the industrial shelving unit. Once I did that I decided to use this piece as an island. And I’m still working on painting that refrigerator. (Remember all those unfinished projects I was talking about?)

Birchwood White

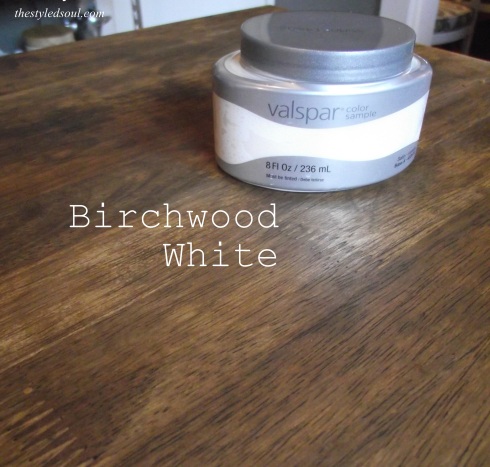
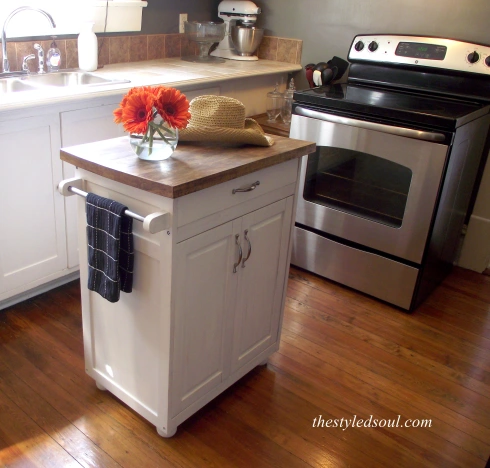
This little makeover was pretty simple. I used some white paint and sandpaper for the base. Birchwood white by Valspar for the first coat  and bright white mystery paint from my basement for the second coat. By the way, this was a free sample of paint. Always check your decorating magazines for a coupon from Lowe’s. Eight ounces of free paint? Yes please.  

DIY Vinegar Stain

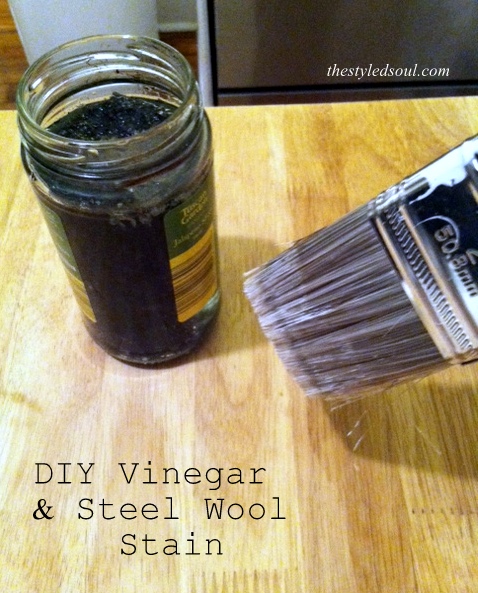
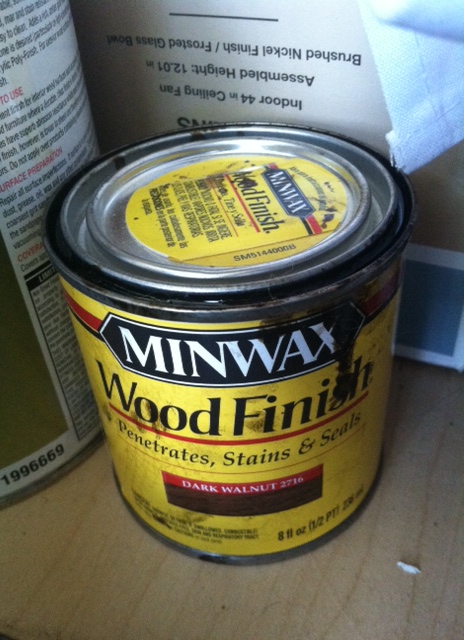
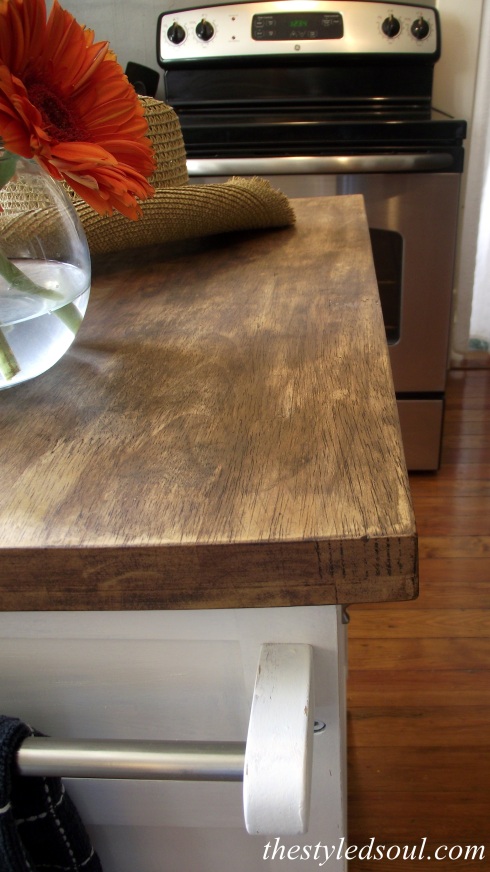
For the top I used a DIY vinegar stain followed by a Minwax stain in Dark Walnut. You can read more about the vinegar stain here. It creates a great ashy finish. 

minwaxdarkwalnut

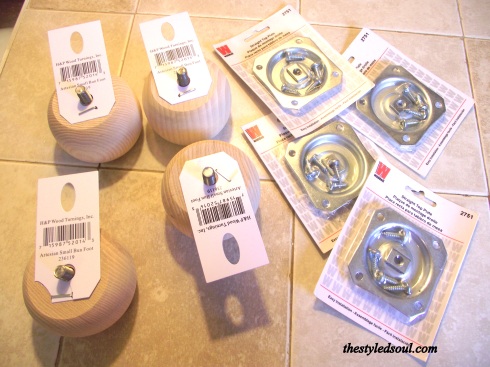
Then I added some simple bun feet using straight top plates.
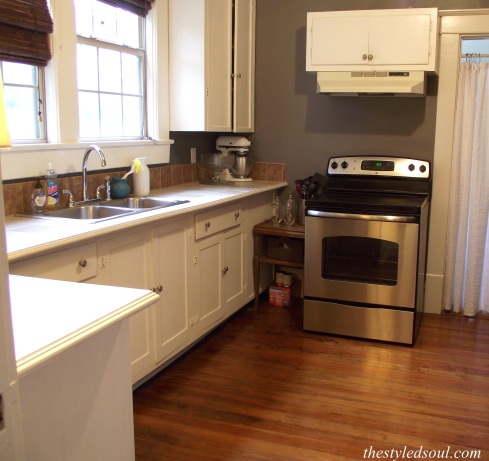
furniture feet and straight top plates

Before

kitchen island before

After

kitchen island makeover after

No Island

kitchen makeover

Island

painted kitchen islandKitchen island makeoverpainted kitchen islandsteel wool and vinegar stain for island

I always thought our kitchen was too small for an island but it actually makes it so much more functional because it gives us more counter space to work with. It’s a small change but it makes a big difference. So that’s one thing I can cross off the list! What’s on your list of unfinished projects?

Linking up at some great linky parties this week. Liz Marie Blog / DIY Showoff / Rain on a Tin Roof / The Shabby Nest  / Suburbs Mama / Domestically Speaking / Start at Home

stephanie

A Little Somethin’

15 Jun

I’ve had this chest for-e-ver. With my new motivation to finish our bedroom I decided it was time to give it a makeover.

DIY nail trim chest

This is what it used to look like.

BEFORE

DIY painted nightstand

painted nightstand before

I finally painted it. White. I know, nothing super exciting. After I painted it I was kinda like, that’s it?

It just needed a little something else. So I added some nail heads. Just on the corners. I used the singles that I had left over from my wine cabinet makeover.

NOW

DIY nailhead trim nightstand

DIY nailhead trim

DIY nail trim accents

DIY nail trim accent

DIY Nail Trim Accent

The top was pretty beat up and still looked a little rough after I painted it. It also has a lot of “worm holes”.  So I thought it would look kind of cool to add a modern element to a piece that has a “worn” and traditional look.

It was so easy. I just hammered each one in with a rubber mallot. I think that gave it a little extra oomph. Sometimes you just need a little extra somethin’.

Happy Weekend Everyone!!

 photo name2_zpsf5f56755.png

Dipped and Fabulous

10 May

Hey there! How was everyone’s week? Mine was kinda busy but I did manage to get a lot done. Including this fabulous little table. dipped end table

Ok so I’m usually a little behind on the trends. This wasn’t even one I was really planning on trying but I just happened to look over by the fireplace and realized I had a black end table next to a black chair. Just seemed like a little too much black going on for one small area.

This is what it looked like after I painted it black but before I moved it next to the black chair.

chalk paint end table

And this is what it looked like when I bought it.

painted end table

I thought this table would look much better painted white but I thought it needed a little something else too. That’s when I remembered the “dipped” trend. I also thought about how much I love a touch of gold.

So after I painted it with two coats of chalk paint in Balboa Mist, my favorite shade of white, I prepped it for the “dipping”. Which isn’t actually dipping at all. (If only it were that easy).

I measured how high I wanted the paint to go up each leg then wrapped it with painters tape. I used Zip Lock bags to protect the top of the legs. I punched a small hole in each one then pulled them up over the legs and secured them tightly with tape.

dipped end table

Then I wrapped the rest of it in plastic and secured it with tape.

dipped end table

Finally, on to the easy part. I sprayed each foot with two coats of Valspar Metallic Gold spray paint letting them dry between coats. All that was left was to apply two coats of Minwax polyurethane in a matte finish.  I decided to leave the hardware white. I didn’t want to take away from the gold. Plus I just think the white on white is pretty.

In case you didn’t notice, I used the coral lamp that I used to have in “the lounge”. It looks so much better on that white table and it gives that little corner the perfect touch of color.

dipped end table

dipped end table

DSCF3441a

dipped end table

dipped end table

Much better. Oh, and yes I realize the  rug is too small. I just wanted to cover the vent for better photos. It’s just a prop stolen from another room :)  So what do you think? Have you ever “dipped” a piece of furniture?

Hope everyone has a happy weekend and a fabulous Mother’s Day!!

Stephanie

Am I Crazy? Reupholstered Dining Chairs

3 May

White upholstery is scary. Granted we don’t have any children. Well, not human ones but we do have three furry ones and they love to sit on the dining chairs. And of course by sit I mean wallow. Plus there is also the whole food thing and my clumsy factor.  Well, white is what I really wanted on these chairs so I went for it. Life’s too short to worry about it. Plus, they’re just chair seats. Right?

grey weathered dining chair

This (below) is what I originally covered the seats with. I loved it at first, but got tired of it pretty quickly. Then, when I moved the dining furniture into another room the fabric REALLY didn’t work. So when I found some white fabric on super clearance at Hancock Fabrics I jumped on it.

grey weathered dining chair

I removed the old fabric with scissors, a screwdriver and pliers. Then, before I cut the fabric I measured the width and length of the seat to determine how much fabric each seat would need.  You basically just measure the width and length then add about six inches to each side.

cut fabric

Then I ironed the fabric and started stapling. I hate using the staple gun. I’m always afraid I’ll point it in the wrong direction and lose an eye.

staple gun

Keep in mind when you go around the corners you have to kind of pull and gather the fabric so it pleats and you don’t get any wrinkles that show on the top.

pleat

Then I cut all the excess fabric off. This is when you cover the bottom of the seat with another piece of fabric so everything is nice and tidy. Yeah, haven’t done that yet. In fact I’ve only recovered one chair so far, which is why the whole table isn’t pictured.

cut excess fabric

I think the white fabric looks so much better with everything else going on in this room.

grey weathered dining chair

grey weathered dining chair

grey white weathered chair

Pretty soon I will have this table and chairs totally finished. You can see what it used to look like here.

So do you think I made the right choice?  Do you use white upholstery in your dining room?

I need to know these things :)

Happy Weekend!!

Stephanie

Furniture Placement: Getting it Right

20 Apr

We have a weird living room. I know, people say that a lot. Seriously I have rearranged the furniture in here about a zillion times. Well I think I finally got it. I decided the best way for us to use this space is by breaking the room in two by floating the sofa in the middle of the room. So we have a small TV area on one side and the dining table (which is just off the kitchen) on the other side. The part that I just couldn’t get right was the area behind the sofa. Until now. Thanks to this little grey table.

DSCF31831a

I found this little guy at my favorite thrift store just down the road. He was sitting out front, all sad and 50% off, just waiting for someone to take him home. Take him home, I did. This is the perfect spot for him.

This table works in so many ways.

  • It completes this TINY conversation area I was trying to create.
  • It’s functional. It’s a spot for a lamp which gives us the lighting we need while sitting on the sofa and it provides much needed storage.
  • It’s the perfect little spot for me and my husband to sit and chat while having a snack and a drink at the end of a long day. (I call it the lounge.)

Also, since it’s right off the kitchen it’s the perfect spot to sit and chat with my husband while he cooks dinner, which he does a lot lately. I know, I’m a lucky girl.

It makes me really glad I kept those Ikat chairs. At one point, for some reason, I decided to sell them and I actually put them on Craigslist. I got a lot of e-mails from people who loved them but didn’t want to drive to Chattanooga from Kansas to pick them up. Yeah….I accidentally posted them on the wrong city’s Craigslist page. Oops. Good thing for me because I love them and they are totally working in our space now.

Anyway, this is what the table looked like when I brought it home.

DSCF3097

I started by painting it with one coat of homemade chalk paint in a grey that I mixed up using the following three colors.

  • Slate Brown
  • Bolboa Mist
  • Baby Seal Black

Then, after lightly sanding it I mixed up a lighter shade of grey using only the slate brown and balboa mist. I used the lighter shade only on the top, around the bottom, and inside the grooves of the doors. Then, after another light sanding I applied a poly in a matte finish.

I also changed out the hardware. I found some really cute glass handles at Hobby Lobby and they were 50% off so I only spent $10.00 for the pair. Oh, and I got the table for $12.99.

I love the way it turned out though I might eventually get a smaller table and move this piece to the bedroom to use as a nightstand. For now, I’m loving this little table and how this area has come together.

Before

Before

DSCF31801

After

DSCF31931

DSCF322011

Linking up this weeks at some fabulous blogs!! You should check them out.

sixsistersstuff.com

too-much-time.com

notjustahousewife.net


sig1

Old Chest Made New

22 Feb

Hi! I’m back with a project I finally finished this week. It wasn’t really that difficult it was just a matter of getting around to it.  Check out my new bookcase/storage cabinet/half chest. Ok I don’t really know what to call it but I love it! It WAS an old chest of drawers we were using in our guest room.  I’m now using it in my home office space as storage.


chest pin

Here’s the story on this piece.

It is like a million years old. It’s a piece my husband had when we met and someone had given it to him. Like I said before, we had been using it here in the guest room but two of the drawers just started to fall apart beyond repair and the veneer was peeling off the top. Since the rest of it was still in pretty good shape I decided to give it a little makeover but use it in a way that wouldn’t require us to have to open the drawers every single day.

So I pulled the casters out of the bottom.

DSCF3924

Then used a putty knife to peel the rest of the veneer off the top.

DSCF3934

Next, I painted it with two coats of chalk paint in my favorite shade of white, Balboa Mist by Benjamin Moore mixed up by Lowe’s in Valspar. Then, after measuring the top two openings of the chest I made a trip to the lumber aisle at Lowe’s and had them cut the boards I would use as shelves.

DSCF2568[1]Then I sanded and painted those with the same color.

DSCF39181

DSCF26251

DSCF26052

This is the perfect piece of furniture to store things we need but don’t use on a regular basis like owner’s manuals, my sewing stuff and old photos. I’m so glad we decided to keep it!

sig1

*I’ve linked up at Liz Marie Blog this week. Check it out!

561339_814737968508_208706387_35562931_246451812_n5

Hope Chest Turned Dining Room Bench

21 Sep

 So I totally lucked out on this hope chest. It was a freebie from someone who just wanted to get rid of it. Well it just so happens that it’s perfect for my dining room. Not only can it be used as storage but I can pull it up to the dining room table as seating when we use the leaf.

 It took me forever to decide what I wanted to do with it but I finally figured it out. This is what it looks like now.

I could have just painted the whole thing but I just wasn’t feeling those floral carvings. So I painted everything but the front panels with two coats of white chalk paint then I lightly distressed it.

Then, I went to Lowe’s and bought a small sheet of birch ( I think ?) and had them cut it into four small pieces that were cut to fit each section. Then I tried to distress them a little using a rock and a hammer but I  almost broke one of them so I made myself  stop. (I got a little crazy with the hammer).

Then I applied a steel wool and vinegar solution similar to what I did to my dining table only this time I didn’t use tea. After I applied the steel wool/vinegar I applied an uneven coat of dark pecan stain. I was hoping to give it a little bit of a weathered look.

Then all that was left to do was apply the panels to the chest. I like E9000 glue for this type of project. If you use it just be prepared to smell it for weeks. It’s really strong.

Before:

After:

I’m still playing around with the pillows and the accessories on the shelves. I can’t decide if it needs color or not. I kinda love the coral with it.

So happy I can mark another dining room project off my list!! One of these days I WILL finish this room.

I’m linked up at

 http://www.lizmarieblog.com/

and

http://www.jenniferrizzo.com/

Coastal Inspirations

15 Sep

So we are back from a week at the beach but I still have beach livin’ on my mind. The sounds, the scents, the colors, oh how I love all that beachy goodness. Everything about being at the beach is so inspiring. I used to dream of living in a home that was straight out of Coastal Living.

image
Well my taste has changed a little since then but I still LOVE all things coastal. So I brought back a few things that would add a little coastal charm to our home.

Seashells! (of course)

One morning as I was walking I found a couple of these awesome shells. Are these capiz shells? (If anyone knows please comment below). And why have I never noticed these before? I thought if I could find enough of these they would look really cool in some sort of glass dish or jar in the dining room. Still haven’t finished the dining room but that’s another story.


Next, I found these!

The colors and shapes of these have a great coastal feel and they are perfect for collecting small things like jewelry, keys, and makeup brushes. The best part is that they were only $1.00 each! I found them at this cute little thrift store near the beach. They had SO MANY things I loved and lots of great furniture, such as …

THIS!


I found this little chair sitting outside the thrift store just waiting for me. I’m a sucker for anything wicker, cane, or bamboo. Hello gorgeous! The chair and cushion are both in great shape and it’s actually really comfortable it just needs some paint and new fabric. I can’t wait to get started on this I just have to decide what I want to do with it..so many possibilities!!

So, after a week of relaxation, great food, and much needed time spent with my little family I’m feeling thankful, inspired,  and ready to tackle some projects.

image

image

image

So long summer…..

$8.99 Side Table

23 Aug

So I found this great little table at a local thrift store and for $8.99 I couldn’t pass it up.  I knew I would either use it as a nightstand or in the living room. Well since we didn’t HAVE an end table in the living room I thought that would be a better option.  Here it is!

It had a standard oak finish, was pretty damaged on the top, and OH MAN it smelled like smoke. So I gave it a good cleaning and used my power sander to sand it down.  After I sanded it I gave it two coats of homemade chalk paint in Dark Kettle Black by Olympic paint. Then I applied a coat of Minwax polyurethane since I wanted it to have a shiny finish.

Once it was dry I spray painted the drawer pulls white using two coats of Valspar white gloss spray paint. I wanted to give it a little bit of a modern look.

Loving my little $8.99 side table!! What do you think?