Tag Archives: coral

Bedroom Makeover: A Much Needed Change

22 Aug

Hey y’all! Hope you’re all having a great week. Mine has been a little rough. We had to say goodbye to our sweet little Lola. She was our furry baby and it was devastating to have to let her go. But I won’t dwell on that. I just want to say that we are so thankful to have been blessed with her in our lives and we SO appreciate all the kind words and prayers from everyone.

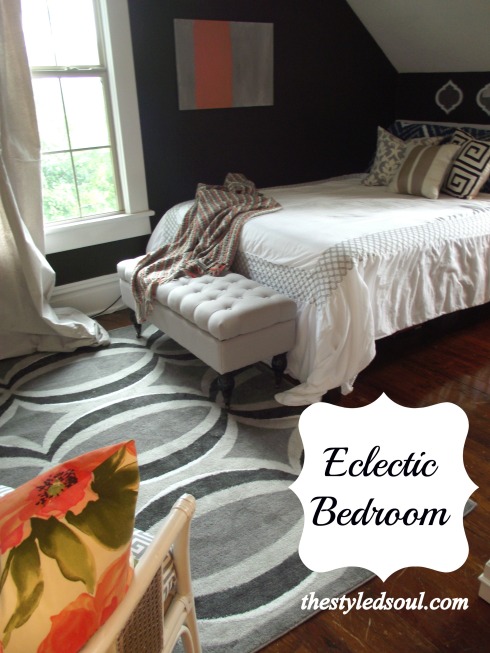
Anyway, I had been planning to give our bedroom a much needed freshening up and after what happened this week it seemed like the perfect time to just get in there and get it done. It was a GREAT distraction. There are still a few more things I want to do, like paint a white wall, add some artwork, and add a new light fixture and some accessories. But I did get a lot done and now it feels fresh and crisp. Exactly what we needed. 

Eclectic Bedroom Makeover

Coral Grey Indigo White Bedroom

Painted Bamboo Wicker Chair

Gold Painted Wicker Bamboo Chair

DIY Upholstered Headboard

Grey Bedroom RugLola
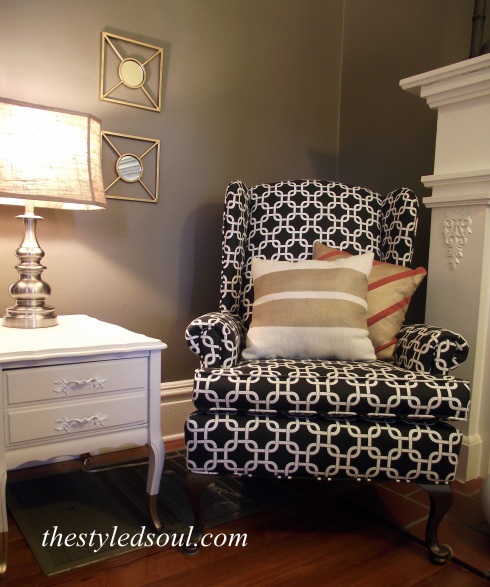
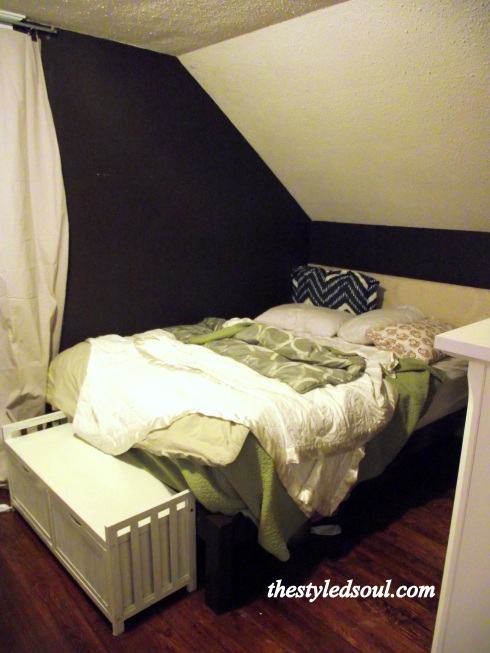
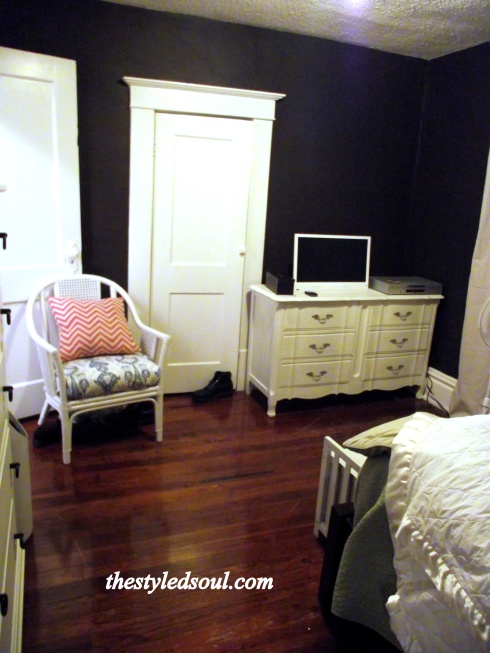
Check out these before pictures.

Bedroom Before

Bedroom Before

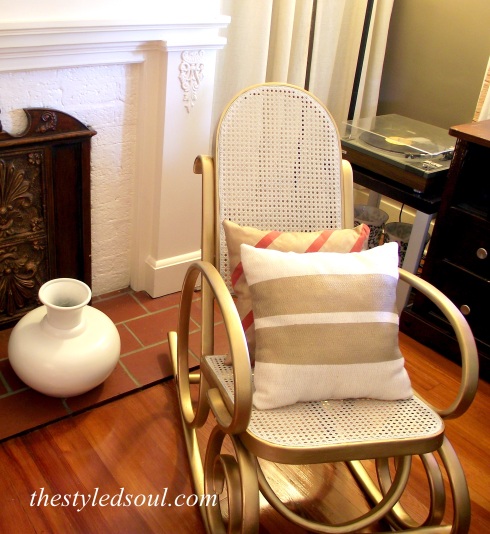
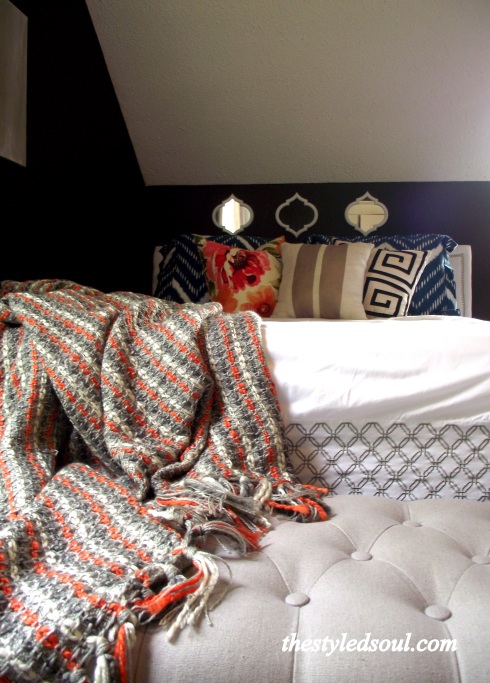
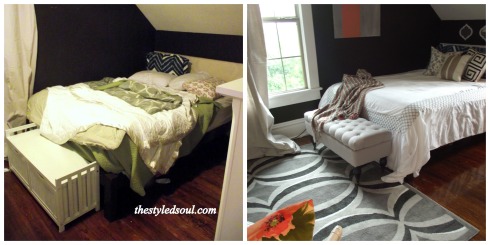
This is what I’ve done so far. 

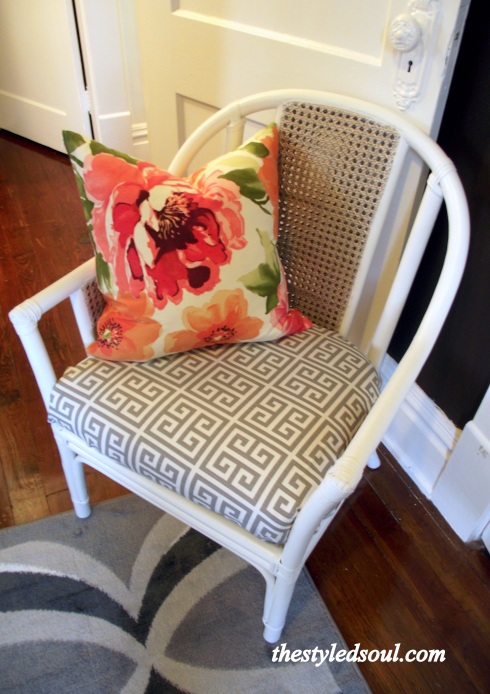
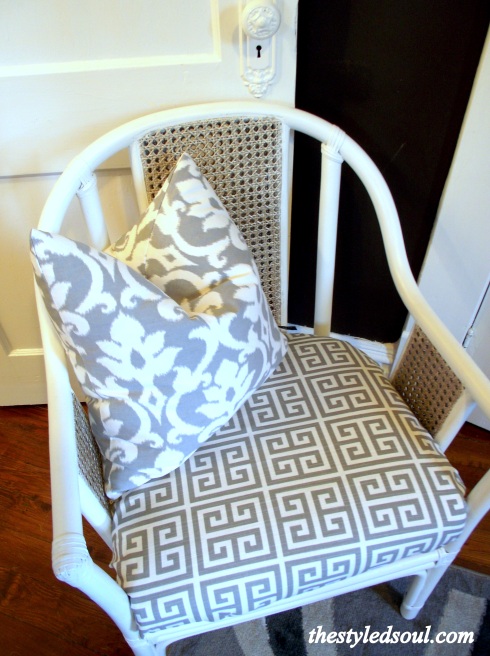
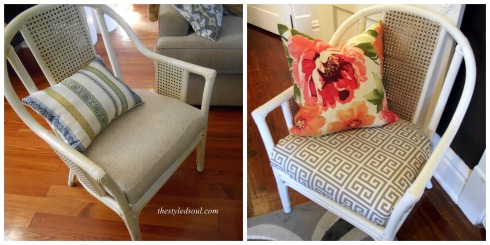
  • Painted the bamboo chair in white and gold. Covered the seat cushion in a grey/white greek key fabric. 
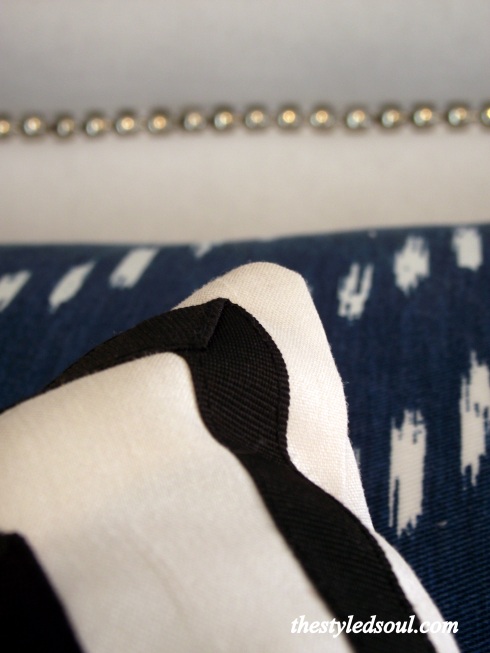
  • Reupholstered the headboard in a bright white fabric and added a nailhead trim. I used a table cloth from Target. 
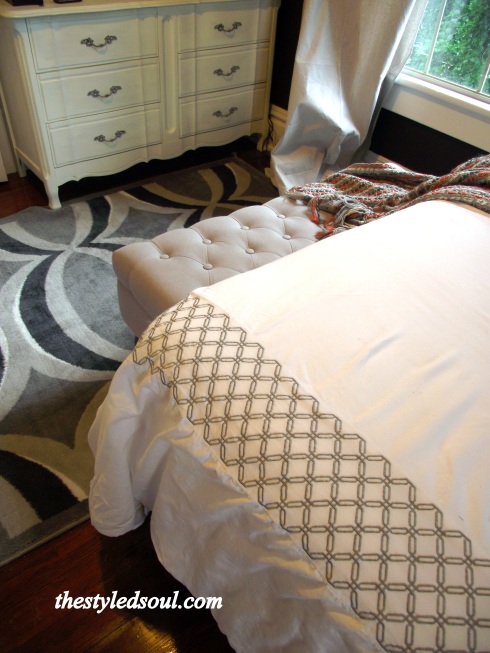
  • Replaced the wooden storage bench with an upholstered ottoman. 
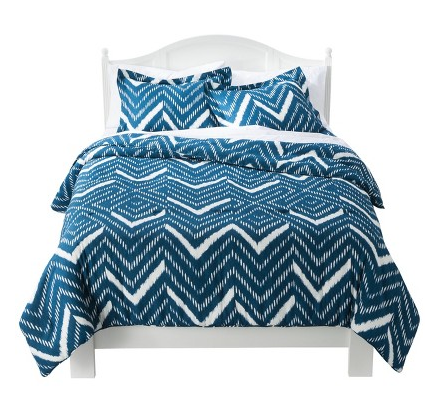
  • Pulled the white duvet cover from the guest room and kept the Nate Berkus indigo pillow shams. (If you’ve been following for a while then you know I was determined to use some of that indigo blue bedding). 
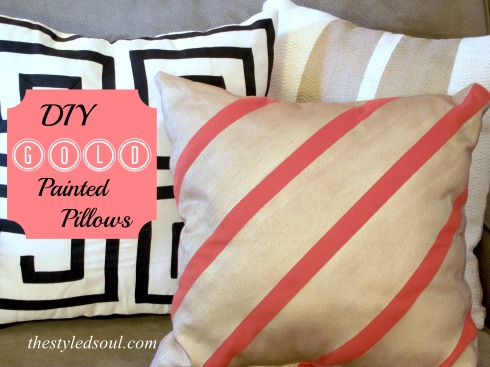
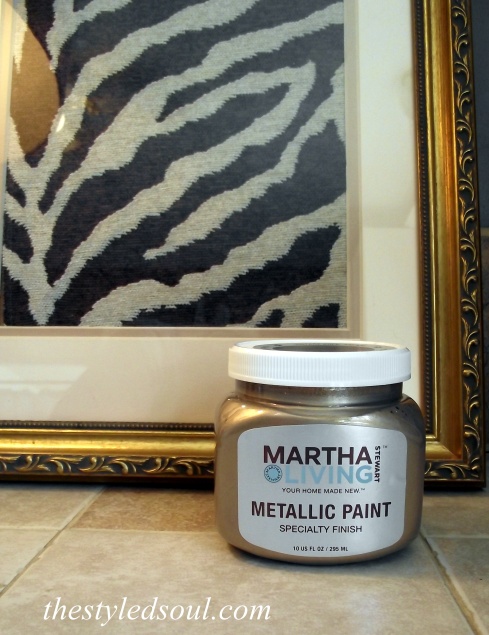
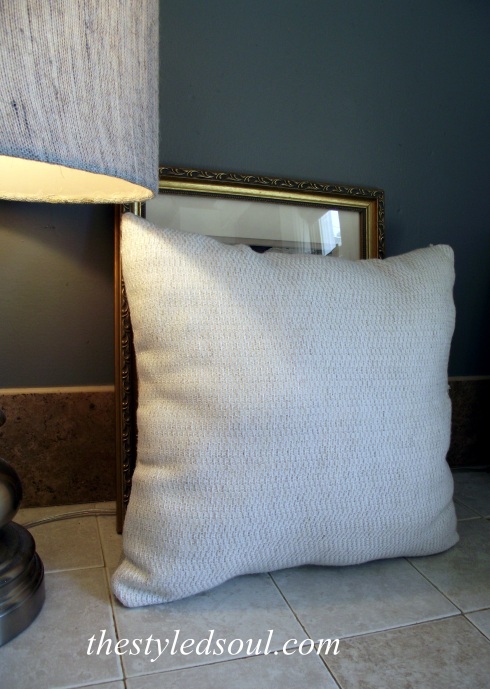
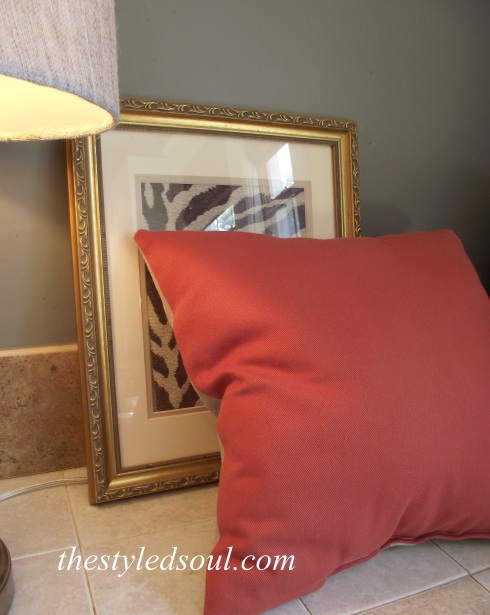
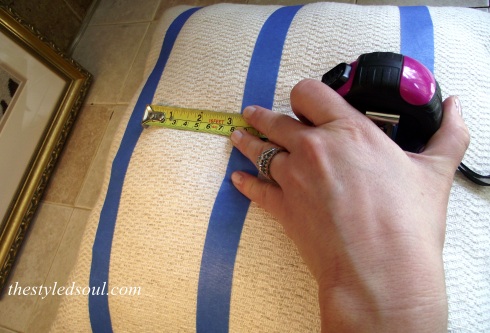
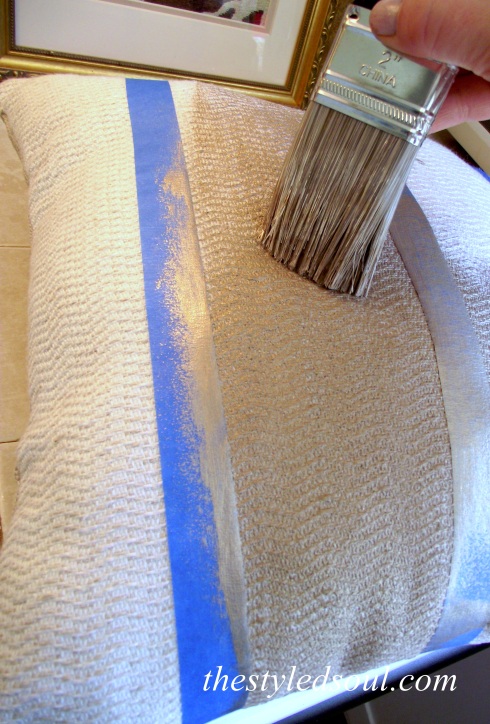
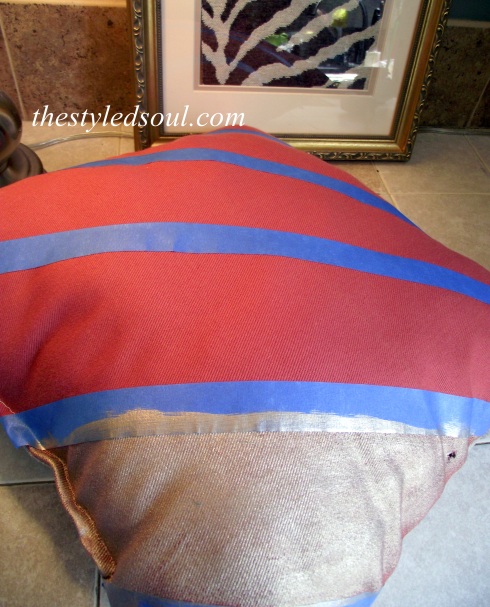
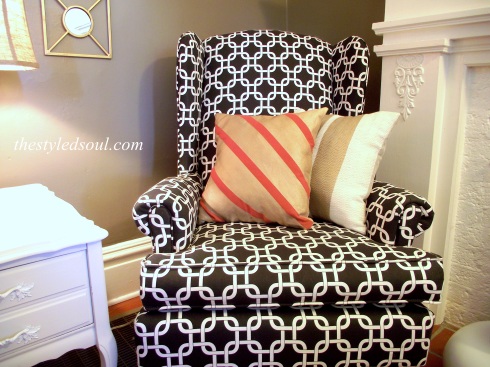
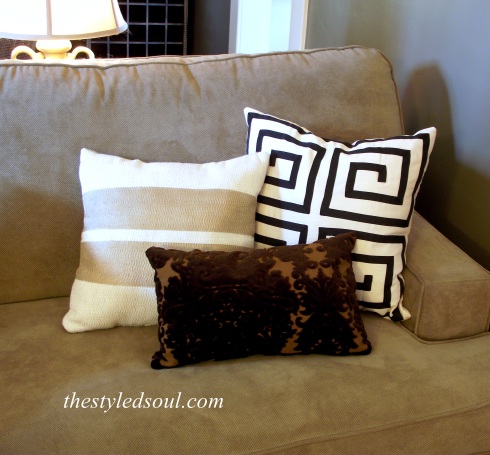
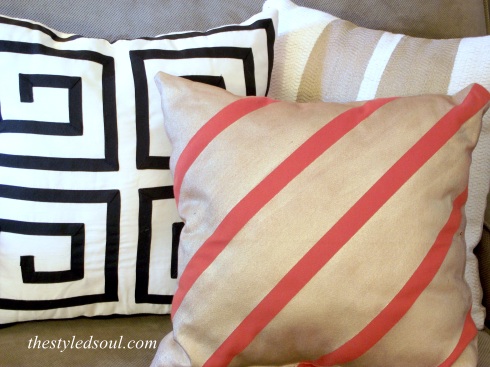
  • Added one of my DIY Gold Painted Pillows along with some other new and old toss pillows. 
  • Added a new rug from Garden Ridge. 
  • Hung a set of mirrors above the bed. I found those at Target. I was trying to create the illusion of a taller headboard. 

Bamboo Wicker Chair Before and After

Bedroom Before and After

I totally believe that if you make your home a happier place you’ll be a happier person. That was pretty much the goal this week, to make our home a happy place to be.

Thanks so much for stopping by. Have a beautiful weekend!

 photo name_zpse215d949.png

Linking up to some fab linky parties this week.

Liz Marie Blog

If It’s Not Baroque

The Shabby Nest

Suburbs Mama

DIY Showoff

Rain on a Tin Roof

Homecoming

The Blissful Bee

A Stylish Interior

DIY Gold Painted Pillows

2 Aug

I have a quick project to share with you today. It’s really easy and can be done in an afternoon. diy gold painted pillows

If you have some pillows you want to jazz up then this is for you. Martha Stewart Metallic Paint. Every time I went to Home Depot I would eyeball this paint. I don’t know what took me so long but I finally bought some.

Martha Stewart Gold PaintThere are about a hundred things I wanted to use this paint on but I decided to start with these plain toss pillows I made a while ago. They were nothing special. I had simply sewn together some old fabric swatches I had lying around. They are so much better now.

This is what I started with.

Martha Stewart Gold Paint

DIY painted pillow

DIY painted pillow

Yeah they are FAR from perfect but keep in mind sewing is “not mah thang”.

I taped off the first pillow so that I would end up with two bold stripes through the center of the pillow. I measured about 3 1/2″ between the strips of tape.

DIY painted pillows

Once I started painting I quickly realized it would work much better with a paint brush.

DIY gold painted pillow

The fabric is textured so it was easier to get the paint to stick in all the grooves with a brush.

A couple of things I learned about painting fabric. 

  • Paint on top of and away from the tape. Not toward it. It felt like the paint would easily slide under the tape.
  • Don’t put a lot of paint on the brush but saturate the fabric really well so you only have to apply one coat.

For the second pillow I wanted a diagonal pattern so I placed the tape in diagonal strips about 3″ apart.

DIY gold painted pillow

This is how they turned out.

diy gold painted pillows

diy gold painted pillowsdiy gold painted pillowsdiy gold painted pillowsdiy gold painted pillows

This was so easy. Seriously, it only took a couple of hours including dry time. I LOVE this paint. Thanks Martha! I can’t wait to try it on some other things. Until now, painting something gold required spray painting which meant if it was raining I could forget it. Oh, and it’s kind of hard to tell in the photos but it has a GORGEOUS metallic sheen and it isn’t as deep of a gold that you get from most spray paints. LOVE!

I’m still playing around with where I want to keep the pillows but for now they look pretty good in the living room. Oh, and I now have new inspiration to refinish our dining chairs. Maybe I can get to that soon….

So have you ever painted fabric? Share!!

This is where I’ll be linking up this week. Come check it out!

Liz Marie Blog

Suburbs Mama

DIY Showoff

Give Me the Goods Monday @ Rain On a Tin Roof

If It’s Not Baroque

The Blissful Bee

Home Coming


 photo name_zpse215d949.png

Here I Go Again

22 Jul

I’m back at it again. Making more design boards for the bedroom. I still haven’t decided if I want to leave the room painted Bittersweet Chocolate or repaint it a lighter shade. Lately I’ve been finding myself drawn to white rooms. There is just something so fresh and clean-looking about a white room.

It makes me think of that song by the Dixie Chicks, Wide Open Spaces. Except in my brain it goes, WHITE Open Spaces. Yeah, that song is gonna be stuck in your head all day. You’re welcome. Anyway…..what I’m thinking about now is leaving one wall Bittersweet Chocolate and painting the rest of the room a soft white. Maybe ;)

Here is my latest design board for the bedroom. 

Styled Soul bedroom design board

This is the plan:

  • Reupholster the headboard in a coral ikat fabric.
  • DIY some white window panels with some type of gold border.
  • Hang some antiqued mirrors/frames. 
  • Bring in my DIY capiz shell chandelier from our little home office.
  • The indigo blue will come from the Nate Berkus bedding I already own. (I know what you’re thinking but it’s working in my mind.)
  • Buy one of these chests I found at Garden Ridge. 

grey mirrored chest garden ridge white mirrored chest garden ridge distressed white mirrored chest garden ridge mirrored chest garden ridge

These chests are all $199.00 or less! So happy they moved into the neighborhood!

The white dresser is from my guest room and I should be able to pick up some mirrors and picture frames at a thrift store for practically nothing.

That’s the plan for now. Just gotta get it done!

 photo name_zpse215d949.png

Coral Chest: My Obession Continues

17 Jul

coral painted chest

As my obsession with coral gets totally out of control I find myself wanting to use more of it in every room.  I am totally obsessed with coral. I found this chest at a thrift store and it was in great condition. It’s the perfect size for the guest room and it has a decent amount of storage space. It was screaming to be painted coral.

This is the before.

thrift store chest

Once I got it home and started painting it I was pretty surprised to find this.

coral painted chest

It’s from Pier One! I’ve never bought any furniture from Pier 1 and this piece is the real deal. It’s actual wood.

I painted this piece starburst orange which is a Benjamin Moore color but I used a combination of Valspar and Glidden paints.

Since I wanted to use the original ring pulls WITHOUT the plates behind them I had to make an adjustment. I used Plastic Wood to fill in the holes that had been drilled to hold the plates. Plastic Wood is perfect for this kind of job because it can be painted or stained.  Once it was sanded and painted there was zero evidence of the outer holes.

wood filler to change hardware

I spray painted the pulls with metallic gold spray paint by Ace Hardware.

Gold spray paint & Rub n Buff

Then I used Rub-n-Buff in gold leaf to paint these weird little accents.

gold leaf rub n buff

Much better.

It’s perfect next to my little chair with the DIY spot fabric.

coral chest before and after

painted coral chest

I finally have a little extra storage for my clothes which means it doesn’t constantly look like a clothes bomb exploded in here. So are you obsessing over anything lately? I would love to know I’m not the only one!

I’m linking up this week at the following AMAZING blogs.

Liz Marie Blog

Miss Mustard Seed

Suburbs Mama

Finding Fabulous

DIY Showoff

Give Me the Goods Monday at Rain on a Tin Roof

A Stroll Thru Life

The Blissful Bee

Domestically Speaking

Not Just a Housewife

Start at Home


 photo name_zpse215d949.png

I Have No Idea What I’m Doing

10 Jun

Here I go changing my mind again. I just CAN’T decide what I’m doing about our bedroom.

I was going for something like this.
black white brown bedroom

decor pad

So I painted the room Bittersweet Chocolate.

Bittersweet Chocolate

But then I found this bedding.

Nate Berkus Bedding

Nate Berkus

I fell in love with it and was thinking I wanted to mix it with some pretty yellows but that just wouldn’t work with the Bittersweet Chocolate.

Plus I’m still not over my obsession with coral-y pinks. So I put this together on Olioboard.

grey coral indigo bedroom

I love this paint color called Storm but I really don’t want to paint again. I know, I’m all over the place. So my dilemma: Do I work with the Bittersweet Chocolate or paint the room? Again.

 photo name2_zpsf5f56755.png

Coral: My Current Obsession

19 Oct

I’m not sure exactly when it happened but recently I’ve developed an obsession with the color coral.  Not in a way that I would want to paint an entire room with it but in a way that I want to put a touch of it in every room. There’s just something about coral. It creates warmth and works with so many different colors. Grey, navy, yellow, charcoal, gold, silver, there are just so many options. Well I though the perfect place to try it out would be the living room.

Our front door and entry area needed a little perking up.

New Coral Door!

(It was hard to get a great picture of it with the light shining through.)

It turns out I had to paint it twice to get the right color but I did finally get it right. I had to go into my “work studio” also known as the kitchen (ha!) and actually mix some paints but I finally got the color right. I started with a bright orange, added some white, then mixed in a little rusty red.

I was so happy with how it turned out that I wanted to go ahead and use it somewhere else. Then I remembered my little grey desk that I painted a million years ago. I still hadn’t finished painting the inside of it.

Here it is now.

Since I had already primed it I just added a coat of white paint. Then once it dried I taped it off and then painted the coral stripes. It never ceases to amaze me that such small changes can create such a big impact. This is why I love love love paint but as I learned this week it is ALL ABOUT getting the color right.