Tag Archives: chic

Spray Paint & Fun Days

25 Oct

So I had some big plans for my off days this week that involved lots and lots of paint. But as it turns out, this weather is just too good and my hubby has the day off work. So we decided to spend the day with our new little guy Brady.

Brady

We adopted him recently from the local Humane Society and he is the best little guy. So we’re gonna go roam around in the Bronco, play at the park and just generally enjoy a rare day off together. Life’s just too short, ya know? So I just have a quick before and after to share this week. I’ll get to the big stuff next week. 

Before 

jar before

After

jar after

This is why I love spray paint! And painters tape. Have a beautiful weekend!

stephanie

Coastal Eclectic Bedroom Chair

4 Oct

It’s so hard to leave the beach. If you follow me on Instagram then you know we just spent a week at the beach doing absolutely nothing. And it was awesome. This was my view pretty much everyday. 

Miramar Beach


It’s kinda hard to get back into the groove of reality but at the same time it’s really good to be home. Anyway, we did a little thrifting while we were there. I love thrift shops in beach towns, they always have the best stuff. While I didn’t bring anything home with me I did remember that I never really shared the makeover of the chair I bought last year at the beach.

 Yep, LAST year. And it was only 20 bucks.I bought it not knowing exactly where I wanted to use it but I knew at some point it would be perfect somewhere. How’s that for vague? This is what it looked like when I bought it. 

wicker chair before

It was a little dirty and a lot blah. It was in great shape though and it’s really comfy.Once I gave our bedroom a little makeover I knew  exactly what to do with the chair.I started by spray painting it white but I knew it needed something else. So I broke out my favorite Purdy brand paint brush to paint the wicker.

martha stewart gold paint

I painted it with this  Martha Stewart Specialty paint in Vintage Gold. This is absolutely one of my favorite gold paints. It has the best shimmery gold finish. 

greek key fabric

Then I recovered the cushion in this greek key fabric. I found it on the remnant table at Hancock Fabrics. I geeked out a little bit right there in the store when I found it. It’s pretty rare to find something this fab so cheap. They sell remnants for around $5.00-$6.00 per yard.  I got about four yards so you’ll be seeing this fabric again.

Then I went back and forth with these two pillows.

I decided I like the grey one best. I love the mix of the patterns in the neutral tones and I especially love it against the shimmery metallic paint.

Wicker Bamboo CHair

Wicker Chair painted Gold and White

Wicker chair with greek key fabric

Wicker gold greek key ikat

wicker bamboo chair

So it only took a year but it did finally get a makeover. Sometimes that’s how long it takes to get something right. It took me the longest to decide what to call this chair but I think it’s kinda coastal and kinda eclectic. So there ya go. You may have noticed I started painting the bedroom. No more Bittersweet Chocolate!  I can’t wait to get it finished so I can show you how much better it looks. And cross it off my list….

This is where you will find me linking up this week. Liz Marie Blog / The Shabby Nest / Suburbs Mama / Rain on a Tin Roof / The Blissful Bee / The DIY Dreamer

stephanie

Bedroom Makeover: A Much Needed Change

22 Aug

Hey y’all! Hope you’re all having a great week. Mine has been a little rough. We had to say goodbye to our sweet little Lola. She was our furry baby and it was devastating to have to let her go. But I won’t dwell on that. I just want to say that we are so thankful to have been blessed with her in our lives and we SO appreciate all the kind words and prayers from everyone.

Anyway, I had been planning to give our bedroom a much needed freshening up and after what happened this week it seemed like the perfect time to just get in there and get it done. It was a GREAT distraction. There are still a few more things I want to do, like paint a white wall, add some artwork, and add a new light fixture and some accessories. But I did get a lot done and now it feels fresh and crisp. Exactly what we needed. 

Eclectic Bedroom Makeover

Coral Grey Indigo White Bedroom

Painted Bamboo Wicker Chair

Gold Painted Wicker Bamboo Chair

DIY Upholstered Headboard

Grey Bedroom RugLolaCheck out these before pictures.

Bedroom Before

Bedroom Before

This is what I’ve done so far. 

  • Painted the bamboo chair in white and gold. Covered the seat cushion in a grey/white greek key fabric. 
  • Reupholstered the headboard in a bright white fabric and added a nailhead trim. I used a table cloth from Target. 
  • Replaced the wooden storage bench with an upholstered ottoman. 
  • Pulled the white duvet cover from the guest room and kept the Nate Berkus indigo pillow shams. (If you’ve been following for a while then you know I was determined to use some of that indigo blue bedding). 
  • Added one of my DIY Gold Painted Pillows along with some other new and old toss pillows. 
  • Added a new rug from Garden Ridge. 
  • Hung a set of mirrors above the bed. I found those at Target. I was trying to create the illusion of a taller headboard. 

Bamboo Wicker Chair Before and After

Bedroom Before and After

I totally believe that if you make your home a happier place you’ll be a happier person. That was pretty much the goal this week, to make our home a happy place to be.

Thanks so much for stopping by. Have a beautiful weekend!

 photo name_zpse215d949.png

Linking up to some fab linky parties this week.

Liz Marie Blog

If It’s Not Baroque

The Shabby Nest

Suburbs Mama

DIY Showoff

Rain on a Tin Roof

Homecoming

The Blissful Bee

A Stylish Interior

Christmas On My Mind

15 Aug

Forever Love


Ok, I know Summer isn’t officially over yet but there is just the slightest touch of fall in the air and it’s got me thinking about the holidays. I am totally one of those people that puts up their Christmas tree the DAY after Thanksgiving and I adore chic Christmas cards, like the one shown above. I found it on a Norwegian website. Click through to the source if you want to see some very cool photos. And if you speak Norwegian tell them I’m a fan. ;)

Anyway,  I’ve been pinning images of some majorly creative Christmas decorating to get some inspiration for what I want to do this year. 

Last year: Black, White, Neutral and Metallic

DIY Christmas StockingsWhite Christmas Tree

Christmas Table Decor

DIY Chrsitmas Stockings

Inspiration

This year I think I’d like to go a little more eclectic. I’m thinking more color and more pattern. As my husband would say, “bring it”.  Check out these images I found for some amazing and VERY non-traditional Christmas decorating ideas.

eclectic-dining-room

Houzz

Caftberry Bush

folklifestyle.com

lonny

lonny.com

Jill Sharp Brinson

Jill Sharp Brinson

modern-christmas-decoration-7

Adorable Home

Better Homes & Gardens Pink Christmas

Better Homes & Gardens

belmont+design+group+christmas+decorations

BDG Style

The great thing about decorating for Christmas is that you can get outside the box a little, since it’s only temporary. I just might have to get started early this year!

Do you get excited about Christmas decorating? Do you use traditional reds and greens or do you mix it up? I would LOVE to see pics of what you’ve done in the past.  Post a link below and it could be pinned to my “Decorating for Christmas” Pinterest board!!

 photo name_zpse215d949.png

DIY Painted Spot Fabric

2 Jul

DIY painted fabric

Have you noticed a trend in fabric lately? This really cool black and white spotted fabric that’s half polka dot half cheetah print? It has such an eclectic chic vibe.

black white spot wallpaper

I’m drooling over these images from pinterest.

tommy smythe living room

How amazing are these chairs in this living room by Tommy Smythe?

spot pilliw furbish

I’m loving this pillow from Furbish Studio.

I was feeling super inspired by all these looks. I LOVE this fabric and was dying to use it somewhere.

spot fabric

I found this great fabric at Warehouse Fabrics Inc.

I could have ordered a yard of it but I just happened to have some white fabric and of course I had some basic black paint. So I decided to make my own ;)

It was super easy. Seriously,  if I can do this anyone can. These are the things you will need.

  • Fabric
  • Paint
  • A basic sponge
  • Scissors
  • Paper plates
  • Paper towels

Take a basic cleaning sponge and pull it apart lengthwise so it isn’t as thick. Then cut out two or three circles. They don’t have to be perfect.

painted fabric

Next,  iron your fabric and lay it on a flat surface. Pour some paint into a paper plate and place an empty paper plate next to it (this is where you will keep your sponge circles) along with some paper towels.  Now that the set up is ready you can start the “painting” process.

I didn’t really go with a pattern since I wanted the spots to look kind of random. I just started in the center and worked my way out. I had three pieces of sponge cut out and I started with the biggest one. I dipped the sponge in the paint, pressed the excess off on the paper towel then pressed the “spot” onto the fabric. I could get about two or three spots on the fabric from each dip in the paint but I did have to go over some of the spots that didn’t look like they had enough paint.

This is what it looked like just after I started.

painted fabric

And this is what it looked like when I was finished.

DIY Painted spot fabric

I just hung it with a clipped pants hanger to dry overnight then I covered this little chair seat with it.

diy painted fabric

DIY painted fabric DSCF3936a

Maybe next time I’ll try it on the wall. Should I?!?!

 photo name_zpse215d949.png

Bling-y Bentwood Rocker

25 May

I have a problem. I’m somewhat addicted to gold spray paint. I feel the need to paint ev-er-y-thing gold. It just adds a touch of drama. I love that.

painted bentwood rocker

My dad gave me this old Bentwood rocker and I took it without much excitement.  I put it in the basement and forgot about it for a while until  one day when I just felt the need to paint something.

bentwood rocker

So I took it outside and painted it blue.

blue bentwood rocker

Yeah…not so much. Huge fail.

Then I put it back in the basement and forgot about it for a while. Again. Well, shortly after that my obsession with gold spray paint began and I had been thinking about all the different things I could paint gold. That’s when I remembered the rocker. I’m loving the new glam look.

painted bentwood rocker

So much better than the blue.

painted bentwood rocker

I just covered and taped off the wicker and spray painted the rest with gold metallic spray paint. I used both Valspar and Ace brand paint. Both are terrific spray paints. Then I used a paint brush to paint the wicker in Balboa Mist.

painted bentwood rocker

painted bentwood rocker

I still haven’t decided where it will stay but  I will probably put it in the living room. It would also be a great bedroom chair.  How cute would this be in a little girl’s room?

Do you have a go-to color for spray painting? I would love to know! Leave a link to your projects in the comments section.

Hope everyone has a fun holiday weekend!

This week I’m linking up at some very cool blogs. You should check them out.

http://madeinaday.com/2013/05/23/made-u-look-linky-72/

http://www.classyclutter.net/2013/05/spotlight-saturday-link-party-6.html

http://suburbsmama.blogspot.com/2013/05/sunday-linky-party-9.html

My Uncommon Slice of Suburbia
Liz Marie Blog

startathome.blogspot.com
Stephanie

Restoration Hardware-Inspired: Wine Cabinet

27 Apr

Hey there! This week I finally finished up a project that has been in the works way too long, but the important thing is I did finish it.

edit2

I refinished, and restyled, a wine cabinet. My inspiration for this makeover comes from Restoration Hardware. I am totally in love with their Zinc collection. This piece in particular.

Restoration Hardware Zinc Chest

I love this look on so many levels. It’s industrial, sleek and chic all at the same time.
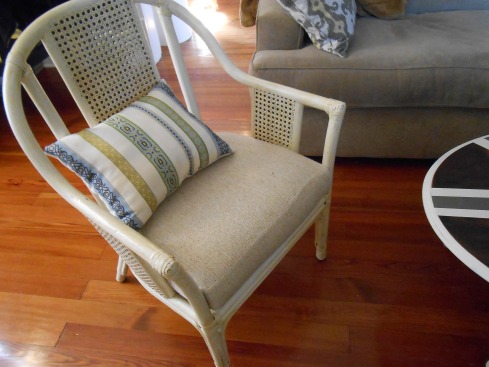
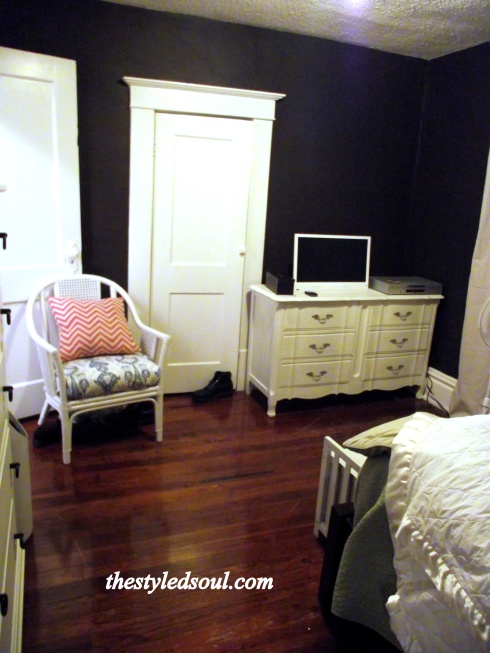
This is the before.
wine cabinet before

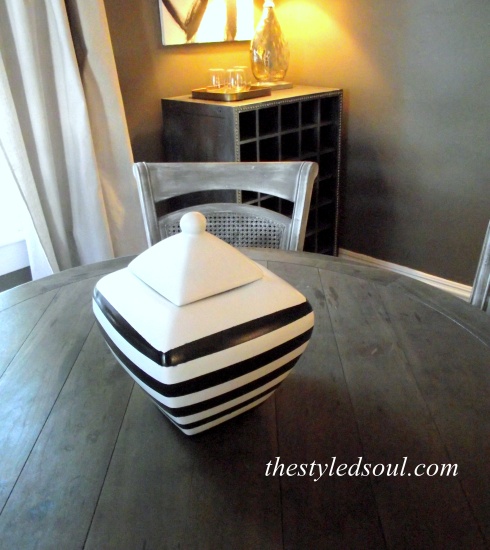
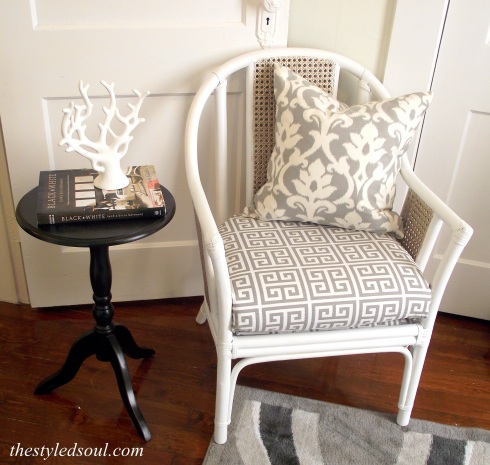
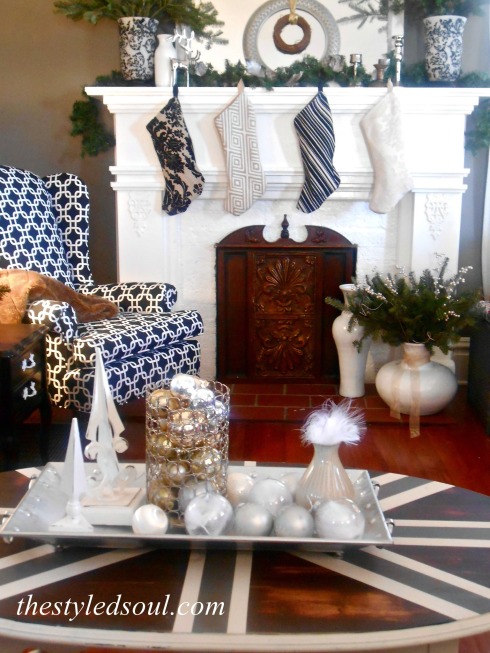
This is what it looks like now.

restoration hardware inspired wine cabinet

It really wasn’t that difficult just time-consuming. Let me break it down.

I started by spot spraying it with Krylon Outdoors Black Metallic Finish spray paint.
Krylon Black Metallic Finish Spray Paint

Then I spot sprayed it with Krylon Outdoors Silver Hammered Metal Finish spray paint.
Krylon Outdoor Spaces Hammered Metal Spray Paint

I used the same treatment for the feet.

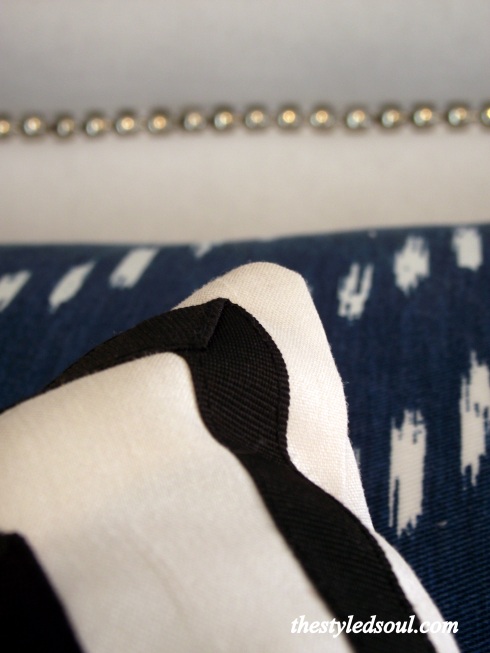
Then I painted the nailhead trim with Rub n Buff in Pewter to give it an aged look.
Rub n Buff Pewter

To apply the nailhead trim I simply measured the four sides of the front then cut the trim into four pieces. The trim is so easy to apply. I found the best way to do it is to hold the individual nailheads with pliers in order to hammer them in. And you will definitely need a mallet rather than a hammer.

Nailhead Trim and Pliers

Mallet for nailhead trim

Once that was done I had to apply the feet. This is much easier if you use straight top plates. They look like this.
Straight top plates

So I basically just decided where I wanted each foot to go then measured for the same spot at each corner and marked each one with a sharpie.
DSCF3241

Then I used the power drill to attach each plate and foot.
DSCF3246

That’s it! It turned out exactly how I had hoped it would.

Restoration Hardware Inspired Wine cabinet

Restoration hardware inspired wine cabinet

restoration hardware inspired wine cabinet

restoration hardware inspired wine cabinet

restoration hardware inspired wine cabinet

Now I just need to fill it up! ;) So what do you think of Restoration Hardware? Has it ever inspired you to refinish something?

P.S. -Linking up at some awesome blogs.  Check out their stuff!!

 http://classyclutter.net/

madeinaday.com

sixsistersstuff.com

suburbsmama.blogspot.com

http://www.domestically-speaking.com/2013/04/175th-power-of-paint-party-popp.html

http://www.houseofhepworths.com/

givemethegoodsmondaybutton_zps2b16a6e3

GrabButtonLiz

sig1

Rub ‘n Buff Rocks

17 Mar

Rub ‘n Buff is an excellent product. It’s easy to use, doesn’t create a mess, and results in an AWESOME finish. If you aren’t familiar with this gem of a product it is basically paint in a tube that is made with waxes, metallic powders and pigments. Just apply and buff.

This is why I think Rub ‘n Buff rocks.

Exhibit A.

before edit

edit5

edit

It took this piece of floral artwork from drab to fab. Looks much more crisp.

Exhibit B.

DSCF2196

DSCF2198

It made this yucky brass hardware go from boring to glam.

Exhibit C.

edit trim

Shiny new nailhead trim gets an aged and weathered look. Exactly what I wanted for a project in progress.

Even better is the selection. It comes in all of these finishes.

cce3d_B003DKZE5A_61Tu6dbAV8L

It’s available at most craft stores and at Amazon. There are so many things you can do with it.  So if you have ever thought about using it, do it! It will change your DIY life.

Finished (Almost) Dining Chairs

25 Jul

My dining table and chairs are (almost) finished!! I’m still adding the upholstery to the rest of the chairs but here is the first one I finished.

In case you forgot here is another before pic of the table and chairs.

I ended up going a different direction with the chairs and I’m so glad I did. My plan was to paint the chairs the same white as the table base but when I finished the second chair I just wasn’t feeling it. They just looked too “new” or something.

So I took some sandpaper and started distressing one of the chairs. I still wasn’t crazy about it. So then…I tried wiping a dark stain on it. Uh..no that didn’t work. It just turned it a yucky beige color. Then I remembered the paint that I used on the edge of the table and it hit me. Dry-brushing! So that’s what I did.

Here’s the breakdown of how I got the look.

  • Step 1: I gave the chairs a good once over sanding with the power sander. Really just enough to knock the shine off so they looked like this.

  • Step 2: I painted the chairs with two coats of chalk paint and I lightly hand-sanded them between coats.

  • Step 3: I distressed the chairs with the power sander to make them look a little “beat up” or “aged”.

  • Step 4: I used the dry brushing technique to apply the slate brown paint.  This is where they start to look “weathered”. If you’ve never dry-brushed something it’s really simple. Basically you just put a tiny amount of paint on the tip of your paintbrush, dab it on a cloth or sponge to remove the excess, and lightly brush the paint onto the furniture with quick back and forth stokes.


I totally lucked out on the fabric. I decided to go to Hancock Fabrics one last time before I ordered any fabric online because I still wasn’t exactly sure what I wanted. I couldn’t believe it when I found this. ( My fabric is a little more blue than this).

It was tagged $12.95 a yard and  it was on sale for 60% off that price which made it $5.18 per yard! Woo hoo! ! I went ahead and got four yards at that price even though that’s probably more than I need. I’m sure to use the extra fabric somewhere else.  So after I removed about a MILLION staples from the chair seats (while being stared at),

I started covering the chairs with the new fabric using my trusty staple gun.


I’m loving the contrast of the “aged” chairs with the clean look of the table base.  I cannot wait to get this room finished! My next step is to paint the room and figure out what I want to do about the window panels. I’ll repost when EVERYTHING is finished.

So what do you think? Would you have left the chairs white? Do you like chairs that match your table or do you prefer a “mixed up” look?

P.S. Little safety tips (useful if you are clumsy like me).  Always wear a mask when sanding and always wear safety goggles when using a staple gun. :)

Stay Tuned!

Dining Table Update

12 Jul

DSCF4265

Well last week was a little crazy with wind storms and trees down everywhere but I did manage to find some time to work on the table. There wasn’t a whole lot else to do without power.  No complaints here though. It could have been a LOT worse.

So…while my very nice and thoughtful husband did this:

I did this:

Good thing my power sander was already charged so I could give the legs a few final touches before painting them. I’m diggin’ this look by the way.

This is the table now.

Totally in love with this table. No really, I just sit and stare at it. Does that make me a little weird? Probably.

This is the table before.


So if you are wondering how I did this here goes.

I started by completely sanding the stain off the top with a power sander using 80 grit sanding pads since I knew I would be staining it. For the base I only gave it a rough once over sanding since I would be painting it. Then I did a little research online about “weathering” new wood. There are several ways to do it but this is the one I went with.

  • Step 1: Prep the stain. Soak some steel wool in white vinegar in a glass jar for at least 24 hours. I used steel wool grade #0000 and used enough vinegar to completely cover the wool. Here’ s a little tip. DO NOT screw the lid on tight.  After about 20 minutes of it sitting on the kitchen counter we heard this strange noise like frying bacon or running water. When we realized it was my little science experiment, and found that the jar was HOT we panicked a little. Luckily Bill was brave enough to take it outside and open it. I was totally prepared for an explosion but thankfully nothing happened so I just sat the lid loosely on top. Crisis averted.

  • Step 2: After you have soaked the steel wool for at least 24 hours and are ready to use the stain you need to brew a strong cup of hot tea and let it cool.
  • Step 3: Apply the tea to the table. I applied one coat using a paint brush. Not a lot but just enough to soak into the wood. It totally freaked me out because this is how it looked wet. It went back to the original color after it dried and it dried pretty quickly.

  • Step 4: This is the best part.  Apply the vinegar solution. I used a paint brush but you could also use a cloth. Just rub it on then wipe off the excess. It’s that easy. I actually applied a second coat just for kicks and because it looked a little light. You could give this a REALLY weathered look by banging the table up a little on the top but I just couldn’t bring myself to do it. I loved the look too much. I figure it will get beat up enough when we start using it.

About the edge of the table…. it wasn’t wood so I had to paint it to match the color of the table top. I just applied one coat of Clark & Kensington paint then distressed it a little with 150 grit sandpaper to make it blend in with the wood. The color is called Slate Brown. I had originally found this paint swatch at Sears but I took it to Ace Hardware and they whipped it up for me.

I painted the base of the table with two coats of homemade chalk paint in Balboa Mist. It is a Benjamin Moore color but again I had it made in Clark & Kensington. If you don’t know about chalk paint I will just tell you. It. Is. Awesome. No sanding required, it will stick to anything, and it is easy to distress. There are a lot of ways to make it but this is the recipe I use. I found it at lizmarieblog.com. FYI…her blog is GREAT!

So that’s it for now. I’m currently working on the chairs and hope to have them done soon. I am painting them the same color as the table base but I’m thinking I will distress them so they look a little different from the table.

Now I just have to decide on a fabric for the chair seats. I’m loving ALL of these fabrics from fabric.com!!

Thoughts?