Tag Archives: living room

Thrift Store Art Makeover: Chic Horses

30 Aug

Hey there! Well this week I’m finally adding some artwork to our home that I’ve been thinking about for the longest. This is proof that pretty artwork doesn’t have to be expensive. For me, it just required a little patience. 

DIY Horse Art

 After weeks of searching I found what I needed.

thrift store frame

1. I had to find the perfect frame. I picked this up at a thrift store for $10.00. 


Horse Poster from Hobby Lobby

2. I had to find the perfect horse print. I’ve seen many photos and paintings of horses but this one just spoke to me. Ya know what I mean? I found this at Hobby Lobby. With their weekly 40% off coupon it only cost around $18.00.


Gold and White Spray Paint

3. I wanted it framed in gold and matted in white. (The frame was already gold but was kind of dated, in a faux finish.)  I picked up these spray paints for less than $10.00. Gold for the frame and white for the mat board.

Before

thrift store frame

After

DIY Horse Art

Less than $40.00 for a large, matted and framed print. Not bad! These guys are getting a home above the fireplace in the living room. I’ll have more pics for you once I get it in place.

Linking up at some great linky parties this week!

Liz Marie Blog

Suburbs Mama

Start at Home

DIY Showoff

Rain On a Tin Roof

Love Grows Wild

The Blissful Bee

A Stylish Interior

 photo name_zpse215d949.png

DIY Gold Painted Pillows

2 Aug

I have a quick project to share with you today. It’s really easy and can be done in an afternoon. diy gold painted pillows

If you have some pillows you want to jazz up then this is for you. Martha Stewart Metallic Paint. Every time I went to Home Depot I would eyeball this paint. I don’t know what took me so long but I finally bought some.

Martha Stewart Gold PaintThere are about a hundred things I wanted to use this paint on but I decided to start with these plain toss pillows I made a while ago. They were nothing special. I had simply sewn together some old fabric swatches I had lying around. They are so much better now.

This is what I started with.

Martha Stewart Gold Paint

DIY painted pillow

DIY painted pillow

Yeah they are FAR from perfect but keep in mind sewing is “not mah thang”.

I taped off the first pillow so that I would end up with two bold stripes through the center of the pillow. I measured about 3 1/2″ between the strips of tape.

DIY painted pillows

Once I started painting I quickly realized it would work much better with a paint brush.

DIY gold painted pillow

The fabric is textured so it was easier to get the paint to stick in all the grooves with a brush.

A couple of things I learned about painting fabric. 

  • Paint on top of and away from the tape. Not toward it. It felt like the paint would easily slide under the tape.
  • Don’t put a lot of paint on the brush but saturate the fabric really well so you only have to apply one coat.

For the second pillow I wanted a diagonal pattern so I placed the tape in diagonal strips about 3″ apart.

DIY gold painted pillow

This is how they turned out.

diy gold painted pillows

diy gold painted pillowsdiy gold painted pillowsdiy gold painted pillowsdiy gold painted pillows

This was so easy. Seriously, it only took a couple of hours including dry time. I LOVE this paint. Thanks Martha! I can’t wait to try it on some other things. Until now, painting something gold required spray painting which meant if it was raining I could forget it. Oh, and it’s kind of hard to tell in the photos but it has a GORGEOUS metallic sheen and it isn’t as deep of a gold that you get from most spray paints. LOVE!

I’m still playing around with where I want to keep the pillows but for now they look pretty good in the living room. Oh, and I now have new inspiration to refinish our dining chairs. Maybe I can get to that soon….

So have you ever painted fabric? Share!!

This is where I’ll be linking up this week. Come check it out!

Liz Marie Blog

Suburbs Mama

DIY Showoff

Give Me the Goods Monday @ Rain On a Tin Roof

If It’s Not Baroque

The Blissful Bee

Home Coming


 photo name_zpse215d949.png

Southeastern Salvage

4 Jul

Just wanted to share a little about a place I love to go. It’s called Southeastern Salvage. They carry a mix of building materials, furniture, and accessories. Oh, and they have free popcorn.

 Even if I don’t buy  anything I always leave a happier person. You won’t find them in every city but if there is one near you, and you haven’t been, you need to check it out. You don’t get a lot of info on the website about what is actually in the store and that’s because the inventory changes a lot. So here is a SMALL sampling of the awesome things they have in stock right now, at the Chattanooga location.

 photo 40EE1CBD-456A-491A-B71C-00DBF9927C16-5194-000003219AB5F1C3_zps429689f7.jpg

LOVING these Moroccan lanterns and decorative driftwood balls.

 photo 39A0F34A-5550-4581-84BF-0119CA5A73E2-5194-0000032171249C06_zps4ddb13c4.jpg

I’ll take anything tufted or with nail trim.

 photo D5325A3A-2875-4F3F-9996-02AE3209EC76-5194-00000321694F66C3_zps3581aa4e.jpg

Don’t even get me started on the Union Jack. I never get tired of seeing that in design.

 photo 76894DE0-28BF-4648-9FE9-4FF5131370AF-5194-0000032128CF0B24_zpsb3b5a867.jpg

Whitewash? Yes please!

 photo E6A5C553-49B7-4223-803F-66B03AC0D465-5194-000003214BF15DFB_zps927c636b.jpg

I feel like I NEED this leather sofa in my life but it would take up our ENTIRE living room.

 photo 97F26581-0D1C-41F1-9A18-C46B7D9B6BED-5194-0000032109542924_zpsaa2d5279.jpg

Cute pillows for $8.00! I mean, come on! How awesome is this stuff? The prices on most things are pretty good, especially the accessories.

driftwood ball

I bought this for $3.00.

I probably would have spent more time looking around (and getting better pictures) but I had to get this little bear to the vet.

 photo 83E0C3D5-D931-4A95-BDF4-3306B0E37C96-5194-0000032283793C4C_zps09bcf8cb.jpg

So go check it out and if you do let me know what kind of great goodies you find.

 photo name_zpse215d949.png

Bling-y Bentwood Rocker

25 May

I have a problem. I’m somewhat addicted to gold spray paint. I feel the need to paint ev-er-y-thing gold. It just adds a touch of drama. I love that.

painted bentwood rocker

My dad gave me this old Bentwood rocker and I took it without much excitement.  I put it in the basement and forgot about it for a while until  one day when I just felt the need to paint something.

bentwood rocker

So I took it outside and painted it blue.

blue bentwood rocker

Yeah…not so much. Huge fail.

Then I put it back in the basement and forgot about it for a while. Again. Well, shortly after that my obsession with gold spray paint began and I had been thinking about all the different things I could paint gold. That’s when I remembered the rocker. I’m loving the new glam look.

painted bentwood rocker

So much better than the blue.

painted bentwood rocker

I just covered and taped off the wicker and spray painted the rest with gold metallic spray paint. I used both Valspar and Ace brand paint. Both are terrific spray paints. Then I used a paint brush to paint the wicker in Balboa Mist.

painted bentwood rocker

painted bentwood rocker

I still haven’t decided where it will stay but  I will probably put it in the living room. It would also be a great bedroom chair.  How cute would this be in a little girl’s room?

Do you have a go-to color for spray painting? I would love to know! Leave a link to your projects in the comments section.

Hope everyone has a fun holiday weekend!

This week I’m linking up at some very cool blogs. You should check them out.

http://madeinaday.com/2013/05/23/made-u-look-linky-72/

http://www.classyclutter.net/2013/05/spotlight-saturday-link-party-6.html

http://suburbsmama.blogspot.com/2013/05/sunday-linky-party-9.html

My Uncommon Slice of Suburbia
Liz Marie Blog

startathome.blogspot.com
Stephanie

Dipped and Fabulous

10 May

Hey there! How was everyone’s week? Mine was kinda busy but I did manage to get a lot done. Including this fabulous little table. dipped end table

Ok so I’m usually a little behind on the trends. This wasn’t even one I was really planning on trying but I just happened to look over by the fireplace and realized I had a black end table next to a black chair. Just seemed like a little too much black going on for one small area.

This is what it looked like after I painted it black but before I moved it next to the black chair.

chalk paint end table

And this is what it looked like when I bought it.

painted end table

I thought this table would look much better painted white but I thought it needed a little something else too. That’s when I remembered the “dipped” trend. I also thought about how much I love a touch of gold.

So after I painted it with two coats of chalk paint in Balboa Mist, my favorite shade of white, I prepped it for the “dipping”. Which isn’t actually dipping at all. (If only it were that easy).

I measured how high I wanted the paint to go up each leg then wrapped it with painters tape. I used Zip Lock bags to protect the top of the legs. I punched a small hole in each one then pulled them up over the legs and secured them tightly with tape.

dipped end table

Then I wrapped the rest of it in plastic and secured it with tape.

dipped end table

Finally, on to the easy part. I sprayed each foot with two coats of Valspar Metallic Gold spray paint letting them dry between coats. All that was left was to apply two coats of Minwax polyurethane in a matte finish.  I decided to leave the hardware white. I didn’t want to take away from the gold. Plus I just think the white on white is pretty.

In case you didn’t notice, I used the coral lamp that I used to have in “the lounge”. It looks so much better on that white table and it gives that little corner the perfect touch of color.

dipped end table

dipped end table

DSCF3441a

dipped end table

dipped end table

Much better. Oh, and yes I realize the  rug is too small. I just wanted to cover the vent for better photos. It’s just a prop stolen from another room :)  So what do you think? Have you ever “dipped” a piece of furniture?

Hope everyone has a happy weekend and a fabulous Mother’s Day!!

Stephanie

Furniture Placement: Getting it Right

20 Apr

We have a weird living room. I know, people say that a lot. Seriously I have rearranged the furniture in here about a zillion times. Well I think I finally got it. I decided the best way for us to use this space is by breaking the room in two by floating the sofa in the middle of the room. So we have a small TV area on one side and the dining table (which is just off the kitchen) on the other side. The part that I just couldn’t get right was the area behind the sofa. Until now. Thanks to this little grey table.

DSCF31831a

I found this little guy at my favorite thrift store just down the road. He was sitting out front, all sad and 50% off, just waiting for someone to take him home. Take him home, I did. This is the perfect spot for him.

This table works in so many ways.

  • It completes this TINY conversation area I was trying to create.
  • It’s functional. It’s a spot for a lamp which gives us the lighting we need while sitting on the sofa and it provides much needed storage.
  • It’s the perfect little spot for me and my husband to sit and chat while having a snack and a drink at the end of a long day. (I call it the lounge.)

Also, since it’s right off the kitchen it’s the perfect spot to sit and chat with my husband while he cooks dinner, which he does a lot lately. I know, I’m a lucky girl.

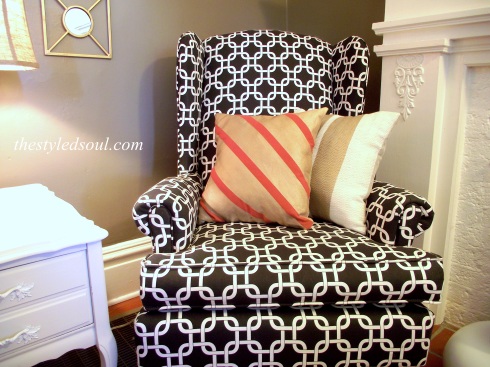
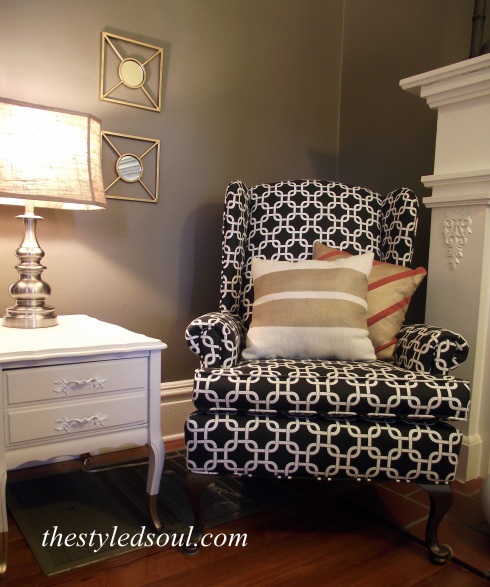
It makes me really glad I kept those Ikat chairs. At one point, for some reason, I decided to sell them and I actually put them on Craigslist. I got a lot of e-mails from people who loved them but didn’t want to drive to Chattanooga from Kansas to pick them up. Yeah….I accidentally posted them on the wrong city’s Craigslist page. Oops. Good thing for me because I love them and they are totally working in our space now.

Anyway, this is what the table looked like when I brought it home.

DSCF3097

I started by painting it with one coat of homemade chalk paint in a grey that I mixed up using the following three colors.

  • Slate Brown
  • Bolboa Mist
  • Baby Seal Black

Then, after lightly sanding it I mixed up a lighter shade of grey using only the slate brown and balboa mist. I used the lighter shade only on the top, around the bottom, and inside the grooves of the doors. Then, after another light sanding I applied a poly in a matte finish.

I also changed out the hardware. I found some really cute glass handles at Hobby Lobby and they were 50% off so I only spent $10.00 for the pair. Oh, and I got the table for $12.99.

I love the way it turned out though I might eventually get a smaller table and move this piece to the bedroom to use as a nightstand. For now, I’m loving this little table and how this area has come together.

Before

Before

DSCF31801

After

DSCF31931

DSCF322011

Linking up this weeks at some fabulous blogs!! You should check them out.

sixsistersstuff.com

too-much-time.com

notjustahousewife.net


sig1

Finished! DIY Christmas Decor

21 Dec

Well here we are. Just FOUR days until Christmas!! I am feelin’ the Christmas spirit like nobody’s business. I have been knee-deep in wrapping paper and DIY decor. I have finished decorating, shopping and (almost) wrapping. I even got Christmas cards sent out this year.

card

I had this made at cardstore.com and got a GREAT deal. Just a little FYI.

Like I told you last time I wanted to do a lot of handmade decorating this year. My goal was to use what we have and spend very little money. Well the only thing I ended up spending on was the tree, a few ornaments and miscellaneous items at a thrift store,  and ribbon. Everything else we already had or I took from the yard.

So you’ve already seen the mantle when I posted my DIY stockings but you probably didn’t see the leaves that I spray painted silver or the branches that I spray painted white and covered in white glitter. The greenery in the vases were pulled from the base of our Christmas tree (we had to remove some anyway to fit it in the stand) and the vases are from our wedding. Two of the candlesticks were purchased at a thrift store and everything else we already had.

DSCN1333

DSCN1563

DSCN1566

These little guys used to be green and yellow. I simply spray painted them white then filled the larger one with more branches from the bottom of the tree. Then I added these swirly floral accents and pearly floral accents I bought a few years ago at Hobby Lobby. I decided to leave the other one empty.

DSCN1552

DSCF4868

Vases before.

I also had this gold tray that I had spray painted silver a while back. I thought it would be perfect to turn into a holiday centerpiece. So I filled a candle holder with silver and gold ornaments, tied together a grouping of white ornaments and  clear ones that are stuffed with white feathers and scattered it around the little beige vase and put a couple of feathers in that. The white wood accents are pulled from the dining room (that I still haven’t finished).

DSCN1510

DSCN0714

Tray before.

This one is my favorite. This is our sassy little kitchen tree. I got this tree a couple of years ago for $5.00! The base is wrapped with sheers from Ikea and the little reindeer underneath were purchased at a thrift store for $1.39 for the pair. The ornaments are from a thrift store and I bought the ribbon at Hobby Lobby when it was half price.

DSCN1445

So now that I’m finished, and still have a few days before Christmas to enjoy it, I might actually try to do some holiday baking. I’ll let you know how it turns out.

DSCN1533

DSCN1454

DSCN1545

May your holidays be filled with love, peace and blessings!

Merry Christmas to you and yours!

sig1

Coral: My Current Obsession

19 Oct

I’m not sure exactly when it happened but recently I’ve developed an obsession with the color coral.  Not in a way that I would want to paint an entire room with it but in a way that I want to put a touch of it in every room. There’s just something about coral. It creates warmth and works with so many different colors. Grey, navy, yellow, charcoal, gold, silver, there are just so many options. Well I though the perfect place to try it out would be the living room.

Our front door and entry area needed a little perking up.

New Coral Door!

(It was hard to get a great picture of it with the light shining through.)

It turns out I had to paint it twice to get the right color but I did finally get it right. I had to go into my “work studio” also known as the kitchen (ha!) and actually mix some paints but I finally got the color right. I started with a bright orange, added some white, then mixed in a little rusty red.

I was so happy with how it turned out that I wanted to go ahead and use it somewhere else. Then I remembered my little grey desk that I painted a million years ago. I still hadn’t finished painting the inside of it.

Here it is now.

Since I had already primed it I just added a coat of white paint. Then once it dried I taped it off and then painted the coral stripes. It never ceases to amaze me that such small changes can create such a big impact. This is why I love love love paint but as I learned this week it is ALL ABOUT getting the color right.

Look What I Found

4 Oct

So so so excited. Let me tell you why. I have been looking for a wingback chair to recover for, like, ever to go in the living room. They aren’t that hard to find on Craigslist or in thrift stores but they usually cost anywhere from $50-$100. That isn’t terrible but we’re talking about a used chair here. I have probably been looking for about a year so you can imagine my excitement when I rolled up on this (minus the cat) outside of a local thrift store for $14.99.   That’s right, $14.99.

So I know it looks a little scary but it’s actually in good condition. The biggest problem I’m having now is deciding on a fabric. I have tossed around the idea of incorporating some coral like this

or this.

On the other hand, I might decide I want to put it in a bedroom at some point. So I thought a grey fabric might be better since it would be neutral plus I LOVE anything grey.

Something like this.

 I thought putting together a couple of mood boards might help me decide.

Board One

Board Two

Well the coral is definitely more exciting but the grey would be more versatile. Plus I could just add color with accessories….hmm……I could use some help here.  Anybody have any other suggestions?

$8.99 Side Table

23 Aug

So I found this great little table at a local thrift store and for $8.99 I couldn’t pass it up.  I knew I would either use it as a nightstand or in the living room. Well since we didn’t HAVE an end table in the living room I thought that would be a better option.  Here it is!

It had a standard oak finish, was pretty damaged on the top, and OH MAN it smelled like smoke. So I gave it a good cleaning and used my power sander to sand it down.  After I sanded it I gave it two coats of homemade chalk paint in Dark Kettle Black by Olympic paint. Then I applied a coat of Minwax polyurethane since I wanted it to have a shiny finish.

Once it was dry I spray painted the drawer pulls white using two coats of Valspar white gloss spray paint. I wanted to give it a little bit of a modern look.

Loving my little $8.99 side table!! What do you think?