Tag Archives: black and white

Spray Paint & Fun Days

25 Oct

So I had some big plans for my off days this week that involved lots and lots of paint. But as it turns out, this weather is just too good and my hubby has the day off work. So we decided to spend the day with our new little guy Brady.

Brady

We adopted him recently from the local Humane Society and he is the best little guy. So we’re gonna go roam around in the Bronco, play at the park and just generally enjoy a rare day off together. Life’s just too short, ya know? So I just have a quick before and after to share this week. I’ll get to the big stuff next week. 

Before 

jar before

After

jar after

This is why I love spray paint! And painters tape. Have a beautiful weekend!

stephanie

My Must-Haves for a Cozy Fall Porch

20 Sep

Cozy Fall Porch

It’s finally my favorite time of year. Fall is here! There is just something about fall  that feels like renewal. I don’t know if it’s just the break from the smothering humidity we get in the south, but I feel like I can breath again. With that feeling comes along the need for change. And the need for salted caramel lattes from Starbucks. Oh. My. Word. Have you ever had one of those things? Forget the pumpkin bring me the salted caramel.

Anyway, since we like to spend time on the porch, especially this time of year, I decided to give it a fresh new look and share my “must-haves” for a cozy fall porch.

1. A seat big enough for two. A bench is perfect for a porch. They’re typically small but still big enough for two. I painted this one with three coats of plain old white paint that had been sitting in the basement for-ever. I used this to paint it. 

Graco SprayStation 1900

This thing is where it’s at! It’s the Graco Spray Station 1900. My brother-in-law gave me this for Christmas and I will be forever grateful. It would have taken days to paint all those slats by hand.

Painted Bench Fall Porch

2.Pillows! Pillows are really a must-have in any situation though, right? I made all of these (except for the sequin pillow and the large brown and white pillow) from leftover fabric remnants and an old shower curtain.

DIY Fall Porch Pillows

DIY Fall Porch Pillows

3. A cozy throw. Perfect to curl up in on a chilly night while reading a good book. I picked this one up at TJ Maxx. It’s soooo soft.

Cozy Fall Porch

4. A tray. You have to have a spot for your coffee or hot chocolate. Or wine. ;) I made this tray from an old picture frame and pretty wrapping paper.

Tray for Fall Porch

Tray for Fall Porch

5. Pumpkins! Is there anything more fall than pumpkins? I could go crazy painting and decorating pumpkins but I limited myself to just two. I spray painted these then blinged them out a little. I added a monogram to the black one using nail trim. For the white one I spray painted the backs of some iron-on leaves and hot glued them to the pumpkin.

Painted PumpkinsPainted Pumpkin Fall Porch

Cozy Fall Porch

Cozy Fall Porch

So do you think I missed anything? So looking forward to hanging out on the porch as the nights get cooler! Happy Fall Ya’ll!!

Linking up at some great blogs this week. Hop over and check them out! Liz Marie Blog / A Stylish Interior / The Shabby Nest / Start at Home / Suburbs Mama / DIY Showoff / Rain on a Tin Roof / The Blissful Bee / The DIY Dreamer / Simply Designing with Ashley / One Project Closer

The Lettered Cottage

 photo name_zpse215d949.png

DIY Painted Spot Fabric

2 Jul

DIY painted fabric

Have you noticed a trend in fabric lately? This really cool black and white spotted fabric that’s half polka dot half cheetah print? It has such an eclectic chic vibe.

black white spot wallpaper

I’m drooling over these images from pinterest.

tommy smythe living room

How amazing are these chairs in this living room by Tommy Smythe?

spot pilliw furbish

I’m loving this pillow from Furbish Studio.

I was feeling super inspired by all these looks. I LOVE this fabric and was dying to use it somewhere.

spot fabric

I found this great fabric at Warehouse Fabrics Inc.

I could have ordered a yard of it but I just happened to have some white fabric and of course I had some basic black paint. So I decided to make my own ;)

It was super easy. Seriously,  if I can do this anyone can. These are the things you will need.

  • Fabric
  • Paint
  • A basic sponge
  • Scissors
  • Paper plates
  • Paper towels

Take a basic cleaning sponge and pull it apart lengthwise so it isn’t as thick. Then cut out two or three circles. They don’t have to be perfect.

painted fabric

Next,  iron your fabric and lay it on a flat surface. Pour some paint into a paper plate and place an empty paper plate next to it (this is where you will keep your sponge circles) along with some paper towels.  Now that the set up is ready you can start the “painting” process.

I didn’t really go with a pattern since I wanted the spots to look kind of random. I just started in the center and worked my way out. I had three pieces of sponge cut out and I started with the biggest one. I dipped the sponge in the paint, pressed the excess off on the paper towel then pressed the “spot” onto the fabric. I could get about two or three spots on the fabric from each dip in the paint but I did have to go over some of the spots that didn’t look like they had enough paint.

This is what it looked like just after I started.

painted fabric

And this is what it looked like when I was finished.

DIY Painted spot fabric

I just hung it with a clipped pants hanger to dry overnight then I covered this little chair seat with it.

diy painted fabric

DIY painted fabric DSCF3936a

Maybe next time I’ll try it on the wall. Should I?!?!

 photo name_zpse215d949.png

Dipped and Fabulous

10 May

Hey there! How was everyone’s week? Mine was kinda busy but I did manage to get a lot done. Including this fabulous little table. dipped end table

Ok so I’m usually a little behind on the trends. This wasn’t even one I was really planning on trying but I just happened to look over by the fireplace and realized I had a black end table next to a black chair. Just seemed like a little too much black going on for one small area.

This is what it looked like after I painted it black but before I moved it next to the black chair.

chalk paint end table

And this is what it looked like when I bought it.

painted end table

I thought this table would look much better painted white but I thought it needed a little something else too. That’s when I remembered the “dipped” trend. I also thought about how much I love a touch of gold.

So after I painted it with two coats of chalk paint in Balboa Mist, my favorite shade of white, I prepped it for the “dipping”. Which isn’t actually dipping at all. (If only it were that easy).

I measured how high I wanted the paint to go up each leg then wrapped it with painters tape. I used Zip Lock bags to protect the top of the legs. I punched a small hole in each one then pulled them up over the legs and secured them tightly with tape.

dipped end table

Then I wrapped the rest of it in plastic and secured it with tape.

dipped end table

Finally, on to the easy part. I sprayed each foot with two coats of Valspar Metallic Gold spray paint letting them dry between coats. All that was left was to apply two coats of Minwax polyurethane in a matte finish.  I decided to leave the hardware white. I didn’t want to take away from the gold. Plus I just think the white on white is pretty.

In case you didn’t notice, I used the coral lamp that I used to have in “the lounge”. It looks so much better on that white table and it gives that little corner the perfect touch of color.

dipped end table

dipped end table

DSCF3441a

dipped end table

dipped end table

Much better. Oh, and yes I realize the  rug is too small. I just wanted to cover the vent for better photos. It’s just a prop stolen from another room :)  So what do you think? Have you ever “dipped” a piece of furniture?

Hope everyone has a happy weekend and a fabulous Mother’s Day!!

Stephanie

Rub ‘n Buff Rocks

17 Mar

Rub ‘n Buff is an excellent product. It’s easy to use, doesn’t create a mess, and results in an AWESOME finish. If you aren’t familiar with this gem of a product it is basically paint in a tube that is made with waxes, metallic powders and pigments. Just apply and buff.

This is why I think Rub ‘n Buff rocks.

Exhibit A.

before edit

edit5

edit

It took this piece of floral artwork from drab to fab. Looks much more crisp.

Exhibit B.

DSCF2196

DSCF2198

It made this yucky brass hardware go from boring to glam.

Exhibit C.

edit trim

Shiny new nailhead trim gets an aged and weathered look. Exactly what I wanted for a project in progress.

Even better is the selection. It comes in all of these finishes.

cce3d_B003DKZE5A_61Tu6dbAV8L

It’s available at most craft stores and at Amazon. There are so many things you can do with it.  So if you have ever thought about using it, do it! It will change your DIY life.

Finished! DIY Christmas Decor

21 Dec

Well here we are. Just FOUR days until Christmas!! I am feelin’ the Christmas spirit like nobody’s business. I have been knee-deep in wrapping paper and DIY decor. I have finished decorating, shopping and (almost) wrapping. I even got Christmas cards sent out this year.

card

I had this made at cardstore.com and got a GREAT deal. Just a little FYI.

Like I told you last time I wanted to do a lot of handmade decorating this year. My goal was to use what we have and spend very little money. Well the only thing I ended up spending on was the tree, a few ornaments and miscellaneous items at a thrift store,  and ribbon. Everything else we already had or I took from the yard.

So you’ve already seen the mantle when I posted my DIY stockings but you probably didn’t see the leaves that I spray painted silver or the branches that I spray painted white and covered in white glitter. The greenery in the vases were pulled from the base of our Christmas tree (we had to remove some anyway to fit it in the stand) and the vases are from our wedding. Two of the candlesticks were purchased at a thrift store and everything else we already had.

DSCN1333

DSCN1563

DSCN1566

These little guys used to be green and yellow. I simply spray painted them white then filled the larger one with more branches from the bottom of the tree. Then I added these swirly floral accents and pearly floral accents I bought a few years ago at Hobby Lobby. I decided to leave the other one empty.

DSCN1552

DSCF4868

Vases before.

I also had this gold tray that I had spray painted silver a while back. I thought it would be perfect to turn into a holiday centerpiece. So I filled a candle holder with silver and gold ornaments, tied together a grouping of white ornaments and  clear ones that are stuffed with white feathers and scattered it around the little beige vase and put a couple of feathers in that. The white wood accents are pulled from the dining room (that I still haven’t finished).

DSCN1510

DSCN0714

Tray before.

This one is my favorite. This is our sassy little kitchen tree. I got this tree a couple of years ago for $5.00! The base is wrapped with sheers from Ikea and the little reindeer underneath were purchased at a thrift store for $1.39 for the pair. The ornaments are from a thrift store and I bought the ribbon at Hobby Lobby when it was half price.

DSCN1445

So now that I’m finished, and still have a few days before Christmas to enjoy it, I might actually try to do some holiday baking. I’ll let you know how it turns out.

DSCN1533

DSCN1454

DSCN1545

May your holidays be filled with love, peace and blessings!

Merry Christmas to you and yours!

sig1

Simple DIY Christmas Stockings

7 Dec

Hey there! It’s been a while but I’m back. I have been busy going through some old Christmas decorations and picking up some new ones. I’m trying to incorporate some handmade decorations this year.

My first handmade project is Christmas stockings. I haven’t used stockings in a couple of years because I haven’t been able to find any I LOVED in my price range. Well, after looking through a book a friend had loaned me, I finally got the idea to just make my own. (duh). I have tons of fabric scraps lying around and many of them just so happen to be perfect for my theme this year.

Here they are!

DSCN1328

Let me begin by clarifying something. I’m pretty bad at sewing. I have tried and tried but I’m just not that good at it. One day I will take a class and learn how to cord pillows and do all kinds of other fancy stuff but for now I’m happy with being able to make a simple stitch. My point is, that’s all you really need to know in order to make your own stockings.

This is what you need to do.

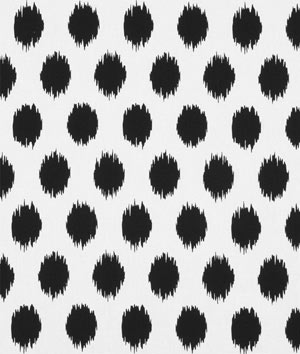
First, use fabric that you love! It doesn’t have to be red and green just because it’s Christmas! I’m really into black and white lately and I’m also really into metallics. So that’s how I came up with my theme for this year. I went through my stock pile of fabric remnants and came up with these.

Then I dug out an ooooold stocking to use as my pattern. I just placed it on top of a fabric I didn’t really like (so it wouldn’t matter if I messed up) then traced it with a sharpie.

Once I had the pattern drawn I cut it with fabric scissors. Then I placed it on top of THE BACK of each fabric I wanted to use as the front of my stockings and traced then cut, one by one. Since I only had enough of the patterned fabrics for the front of the stockings I chose a neutral fabric for the backs and traced and cut these one by one. This won’t really matter since you won’t see the back anyway and it’s a good way to cut your cost if you are buying fabric to make stockings.

Ok, now comes the fun part. (I’m using the term “fun” loosely here). Place the fabrics FACE TO FACE. Now you should really pin the fabric together but since I am the most impatient person in the world I never do this. I jump right into sewing, holding the fabric together as I go.

DSCN1258

Once you’ve sewn all the way around (except across the top) just turn them inside out. Now I wanted to make this as easy as possible. So to give the top a finished look I simply hot glued the top of the inside, folded it in and pressed it until it dried. Then I cut a small strip of fabric for each stocking, made a loop and hot glued those one by one onto each stocking.

I know they aren’t perfect but I really just wanted some basic, simple, pretty stockings.  I also decided I had to put our new black and white chair by the fireplace and it looks so much better over there. What do you think?

DSCN1328 DSCN1331

DSCN1338

Be back soon!

sig1

DIY Abstract Art

31 Oct

I have always loved abstract paintings. The problem is every time I find one I just can’t make the commitment to buy it. I’m not saying they aren’t worth what they cost I’m just saying I’m a girl on a budget.  Well I remembered that I had some old canvases from a (failed) diy project.

I also had some black paint. So I decided to make my own artwork. I used this piece from Little Green Notebook as my inspiration.

I had to cover up the hot mess that I made before so I started by applying primer. I applied the primer with a roller then went over it with a wide paint brush in quick back and forth strokes. This gave it a “grittiness” that added a nice texture. I had to do this three times to fully cover the old paint.

Then, I took another wide paint brush and painted black messy lines in a similar patter to my inspiration piece. Next,  I took a smaller paint brush and added a little grey paint. I tried to randomly “muddle” it into the center to make it look a little messier.

 I put it in the living room near my new coral door but I’m going to be changing up that area pretty soon.

So I moved it to the kitchen. It turns out that is the PERFECT place for it.

Have you ever painted any abstract art? I would love to see it!!